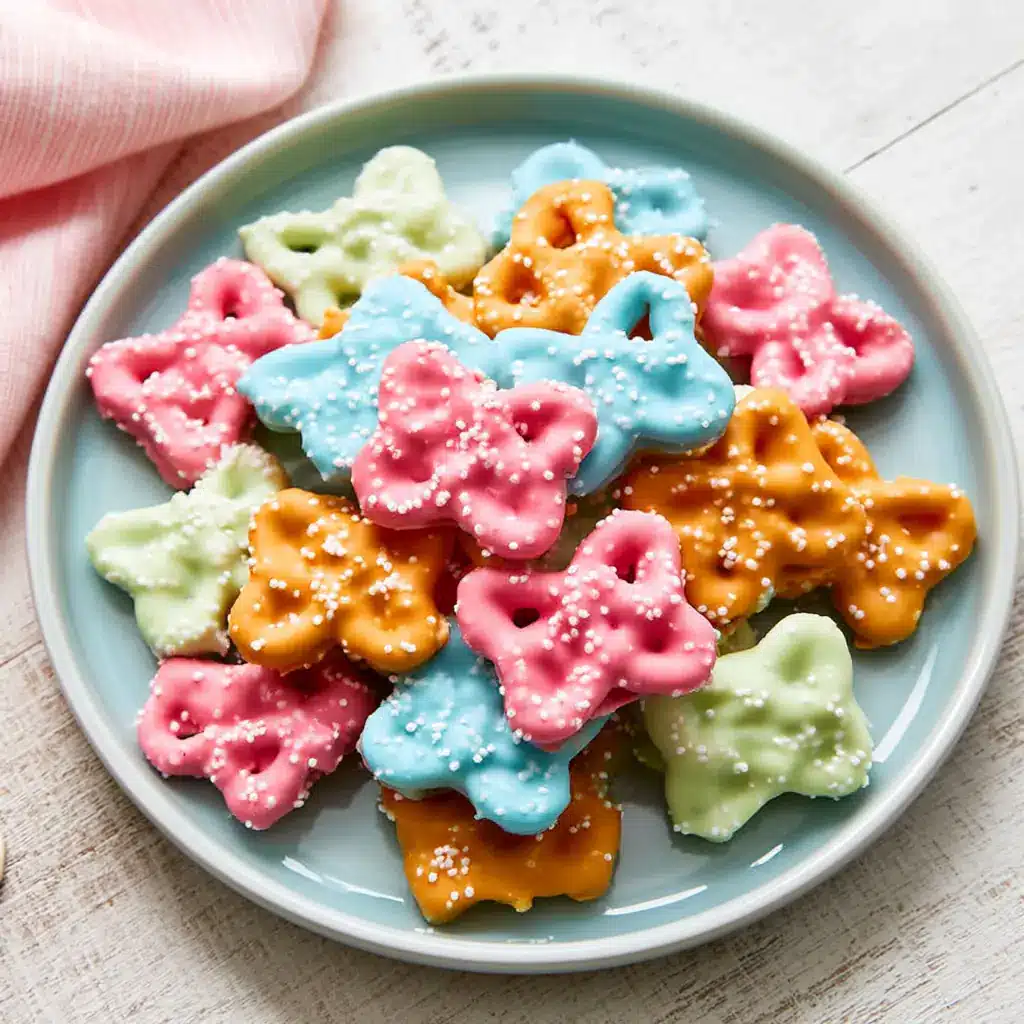
Colorful Butterfly Pretzels turn a few simple snack ingredients into a cheerful spring treat that looks almost too cute to eat. Crisp mini pretzels create the wings, while pastel candy melts add sweet flavor and bright seasonal color. Meanwhile, a dipped pretzel stick forms the butterfly body, and tiny white sprinkles finish each treat with a delicate dotted pattern. These playful bites work beautifully for Easter tables, classroom celebrations, garden parties, or afternoon snacks with kids. Best of all, you need no oven and very little preparation. With a microwave, parchment paper, and a little creativity, you can make an eye-catching batch quickly.
A Sweet Spring Story Behind Colorful Butterfly Pretzels
The first time I made Colorful Butterfly Pretzels, I wanted a spring snack that felt festive without requiring a full afternoon of baking. I already had mini pretzels in the pantry, and pastel candy melts immediately made me think of butterfly wings. After arranging two dipped twists beside a small pretzel-stick body, the idea came together beautifully. Since then, Colorful Butterfly Pretzels have become one of my favorite spring pretzel treats for casual celebrations. They offer the classic sweet-and-salty combination that everyone reaches for, yet they also look special on a dessert tray. Additionally, kids can help choose colors, add sprinkles, and arrange the wings. Colorful Butterfly Pretzels also fit naturally among butterfly snack ideas because the shape stays recognizable without complicated decorating. Although they look detailed, the actual method remains wonderfully simple. Therefore, I often prepare Colorful Butterfly Pretzels when I need fun spring snacks that add instant color to a table. The process feels like edible crafting, so these treats also work perfectly for families who enjoy easy pretzel crafts during spring break or Easter weekend.
Ingredients
You will need 48 mini pretzels, 12 standard pretzel sticks, 1 cup pink candy melts, 1 cup blue candy melts, 1 cup green candy melts, 1 cup orange candy melts, and 2 tablespoons white nonpareil sprinkles. You will also need wax paper or parchment paper for setting the finished butterflies. For equipment, gather four microwave-safe bowls and food tweezers or two small forks for dipping. These quantities make about 24 Colorful Butterfly Pretzels, although the final yield may vary slightly if a few pretzels break. Choose whole mini pretzels with clean loops because symmetrical pieces create prettier wings. Likewise, use fresh candy melts for the smoothest coating. You can use one pastel shade if you prefer, but several colors create a bright spring platter. Keep extra pretzels nearby because thin pretzel sticks sometimes snap while you break them into shorter butterfly bodies.
Step-by-Step Instructions
The process for Colorful Butterfly Pretzels moves quickly once the candy melts become smooth, so organize every ingredient before dipping. First, line a large tray or clean work surface with wax paper or parchment paper. Next, sort the mini pretzels into matching pairs and break each pretzel stick in half. Then place the sprinkles, dipping tools, and bowls within easy reach. Because candy coating begins setting as it cools, this simple setup helps you assemble each butterfly while the coating still feels tacky enough to hold the pieces and sprinkles. Work with one candy color at a time if you prefer a slower pace, or melt several colors when another person can help assemble the butterflies. Either method works well as long as you keep the coating smooth and move steadily.
Preparing the Ingredients
Start by inspecting the mini pretzels and setting aside cracked pieces for another snack. Pair similar pretzels so each butterfly has balanced wings. Then snap 12 pretzel sticks in half to create 24 short bodies. Lay parchment or wax paper across your tray, leaving enough open space for every butterfly to set without touching. Divide the pink, blue, green, and orange candy melts among separate microwave-safe bowls. Keep your food tweezers or forks beside the bowls. Finally, pour the white nonpareils into a small dish so you can pinch them quickly. This preparation matters because the candy coating can firm as you work. Therefore, arranging everything beforehand makes dipping cleaner and assembly easier. If children help, let them sort colors or pair pretzels while an adult handles the warm bowls. Once your station looks organized, begin melting the first candy color and assemble the butterflies in small batches.
Cooking Instructions
Microwave one bowl of candy melts for 30 seconds, then stir thoroughly. Continue heating in 30-second intervals, stirring after every interval, until the coating looks completely smooth. Dip one half pretzel stick fully into the melted candy, lift it carefully, and let excess coating drip into the bowl. Place the coated stick on the lined surface. Next, hold one mini pretzel with tweezers or two forks and dip it into the same candy color until coated. Gently shake away excess coating, then place the pretzel beside one side of the stick to form a wing. Dip a second mini pretzel and place it on the opposite side. Adjust the pieces immediately so they touch and resemble a butterfly. While the coating remains wet, scatter white nonpareils over the wings. Repeat with the remaining pretzels and pastel colors. Let every butterfly stand at room temperature until firm. Alternatively, refrigerate the tray for a few minutes when you need the candy coating to harden faster.
Tips for Perfect Results
For the prettiest Colorful Butterfly Pretzels, pay close attention to candy consistency and assembly timing. Smooth candy melts coat the pretzels evenly, while thick coating can create heavy edges and hide the familiar pretzel shape. Therefore, stir frequently and reheat the coating for a few seconds whenever it begins to thicken. Also, assemble each butterfly immediately after dipping the body and wings. The fresh coating helps the pieces sit closely together and creates a neater finished shape. Food tweezers make dipping especially clean, although two forks work well when tweezers are unavailable. Keep the lined tray flat while the treats set, and resist moving the butterflies too soon. Once fully hardened, the coating feels dry and releases easily from parchment or wax paper. These small habits keep the process simple and help every colorful batch look polished enough for a spring dessert platter.
Common Mistakes to Avoid
The most common mistake involves overheating candy melts. Excessive heat can make the coating thick, grainy, or difficult to dip, so use short microwave intervals and stir every time. Another mistake involves waiting too long before adding the sprinkles. White nonpareils need wet candy coating to stick, so decorate each butterfly immediately after assembly. Additionally, avoid placing the wings too far from the pretzel-stick body. Position both dipped mini pretzels directly beside the center piece while the coating remains soft. Do not shake dipped pretzels aggressively because thin twists can crack. Instead, use a gentle tapping motion to remove extra coating. Finally, never peel the butterflies from the parchment before the candy fully hardens. Early handling can separate the wings or leave fingerprints in the surface. Give the treats enough setting time, then lift them carefully from the lined tray and arrange them for serving.
Pro Tips for Better Flavor
Although the basic recipe tastes delicious, a few thoughtful choices can make the sweet-and-salty contrast even better. Choose crisp, lightly salted mini pretzels because their savory crunch balances the sweet candy coating. You can also mix pastel colors across the platter rather than making every butterfly identical. For example, prepare a row of pink butterflies, then switch to blue, green, and orange for a bright garden-inspired display. If you love extra texture, add a light sprinkle of nonpareils instead of covering the entire wing. That approach keeps the pretzel crunch noticeable and prevents the decoration from overpowering the candy flavor. Additionally, serve the butterflies at cool room temperature for the best texture. Very cold candy coating can feel overly firm, while warm conditions may soften it. For parties, make the treats ahead, store them properly, and arrange them shortly before guests arrive for the freshest presentation.
Serving and Storage
Colorful Butterfly Pretzels make a playful addition to spring celebrations because you can serve them individually or build an entire themed snack display around them. Arrange several pastel colors together on a white platter to highlight the butterfly shapes. You can also add them to Easter dessert boards, birthday snack tables, baby shower spreads, or classroom party trays. Since each treat already comes in a small portion, guests can grab one without cutting or serving utensils. For storage, protect the candy coating from heat and moisture. Place completely set butterflies in an airtight container and separate layers with parchment paper. Keep the container in a cool, dry location. If your kitchen runs warm, brief refrigeration can help, although condensation may affect the candy surface. Proper handling preserves the crisp pretzel center, smooth coating, and delicate sprinkle decoration until you are ready to serve the batch.
How to Serve
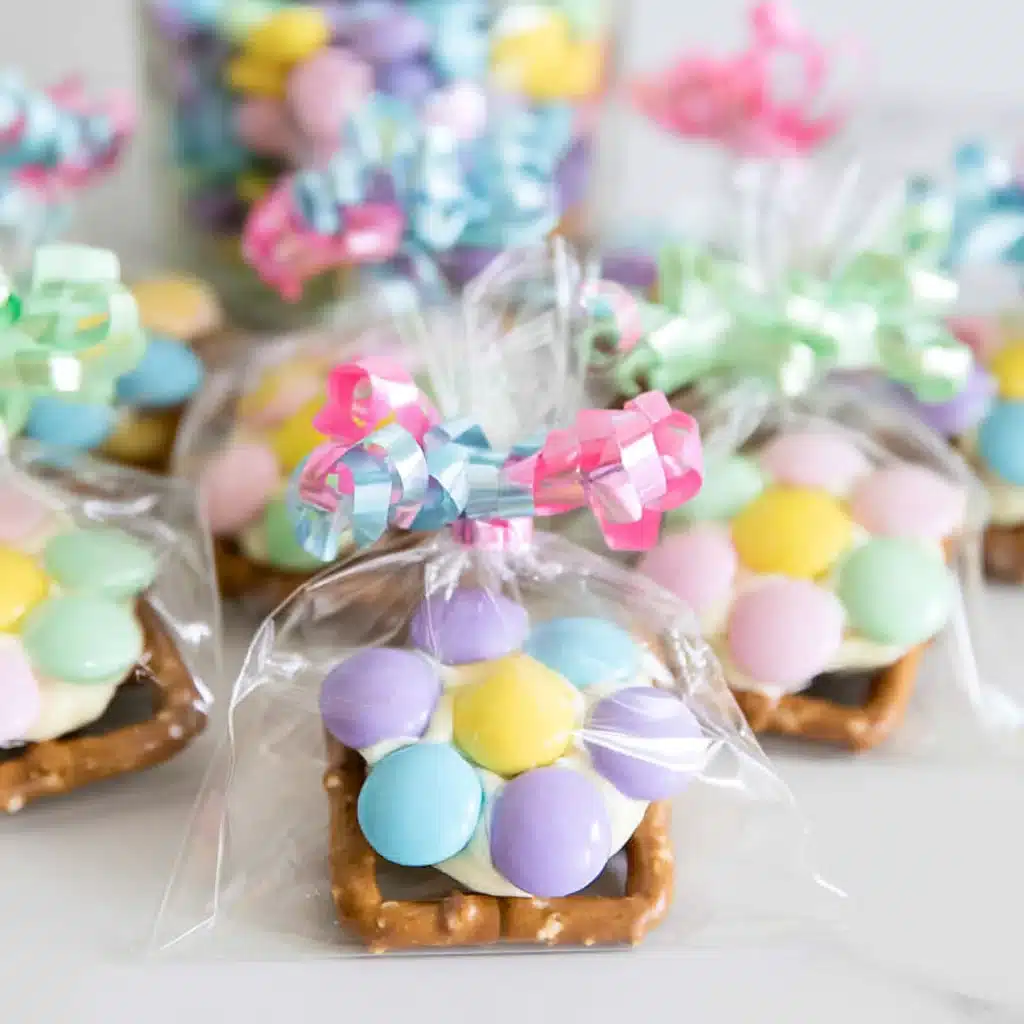
Serve Colorful Butterfly Pretzels on a wide platter with enough space for guests to notice their shape. For an Easter table, place them beside pastel cookies, fresh strawberries, or candy eggs. At a spring birthday party, arrange the butterflies around a small bowl of colorful candies to create a simple garden theme. You can also package two or three treats in clear food-safe bags for party favors or classroom gifts. However, wait until the candy coating fully sets before packaging them. For a family snack activity, place the finished butterflies on individual plates and let everyone choose a favorite color. Because the treats combine crunchy pretzels with sweet candy coating, they pair nicely with milk, coffee, or a simple fruit platter. Keep them away from direct sunlight during outdoor gatherings, since strong warmth can soften the pastel coating and make the butterflies messy to handle.
How to Store Leftovers
Let every butterfly harden completely before transferring leftovers to storage. Then place the treats in a shallow airtight container in a single layer. If you need to stack them, add parchment paper between layers to protect the candy coating and sprinkles. Store Colorful Butterfly Pretzels in a cool, dry pantry for up to one week. Avoid humid areas because moisture can soften the pretzels and affect the candy finish. You usually do not need to refrigerate these treats. However, if your home stays very warm, place the sealed container in the refrigerator and allow the butterflies to sit briefly at room temperature before serving. Do not microwave or reheat leftovers because heat will melt the candy coating. Instead, serve them directly from storage once they reach a pleasant temperature. Check the pretzel texture before serving older batches, since crispness provides the best sweet-and-salty experience.
Conclusion
Colorful Butterfly Pretzels prove that a charming spring treat does not need complicated baking or advanced decorating skills. With mini pretzels, pretzel sticks, pastel candy melts, and white sprinkles, you can create cheerful butterflies that bring color and crunch to any seasonal table. The recipe works especially well for Easter, spring parties, classroom celebrations, or a creative afternoon with kids. Moreover, the dipping method stays simple enough for beginners, while the finished treats still look impressive on a platter. Choose your favorite pastel colors, prepare a clean dipping station, and give each butterfly enough time to set. Then share the sweet-and-salty results with family and friends. Try a batch of Colorful Butterfly Pretzels this spring, and enjoy turning everyday pantry snacks into a bright edible garden of playful butterfly treats.
Discover more delicious recipes by following me on Facebook and Pinterest.
Frequently Asked Questions
Can I Use White Chocolate Instead of Candy Melts?
Yes, you can use white chocolate, although the texture and setting behavior may differ from candy melts. Choose melting wafers or good-quality white chocolate that melts smoothly, then divide it into bowls and tint each portion with oil-based candy coloring. Avoid water-based food coloring because even a small amount of moisture can make melted chocolate seize. Candy melts remain the easiest choice when you want strong pastel colors and a coating that sets firmly at room temperature. However, white chocolate offers a richer dairy flavor. Whichever option you choose, microwave it in short intervals and stir frequently. If the coating becomes too thick for dipping, warm it briefly rather than adding water. Test one pretzel first, then adjust the consistency before coating the full batch. This small test helps you create smooth butterfly wings with less waste and fewer broken pretzels.
How Far Ahead Can I Make Colorful Butterfly Pretzels?
You can make Colorful Butterfly Pretzels several days before serving, which makes them convenient for parties and spring celebrations. For the best crunch and appearance, prepare them one to three days ahead. Let the coating harden completely, then transfer the butterflies to an airtight container. Place parchment paper between layers and keep the container in a cool, dry pantry. Avoid storing the treats near a stove, sunny window, or other warm area because heat may soften the candy coating. Also, protect the pretzels from humidity, which can reduce their crisp texture. If you prepare the butterflies a full week ahead, check their crunch before adding them to your serving platter. The treats may remain edible, but freshly crisp pretzels provide a better contrast with the sweet coating. Arrange them shortly before serving so the colorful butterfly shapes stay neat and inviting.
Can Kids Help Make These Butterfly Pretzels?
Yes, this recipe makes a wonderful supervised kitchen activity for kids. Children can sort mini pretzels into pairs, choose pastel colors, sprinkle white nonpareils, and help arrange fully dipped pieces into butterfly shapes. Adults should handle the warm microwave bowls and assist with dipping when the melted candy feels hot. For younger children, prepare the dipped pretzels yourself and let them add sprinkles immediately afterward. Older children can use food tweezers or forks to dip pretzels with close supervision. You can also offer colorful sprinkles and let each child decorate a small batch differently. Keep the work surface lined with parchment paper to make cleanup easier. Because the recipe combines snack making with a simple edible craft, it keeps little helpers involved without requiring complicated baking steps. Once the butterflies set, everyone can enjoy the colorful treats they helped create.
Colorful Butterfly Pretzels
- Total Time: 45 minutes
- Yield: 24 butterfly pretzels 1x
- Diet: Vegetarian
Description
Colorful Butterfly Pretzels are easy no-bake spring treats made with crunchy pretzels, pastel candy melts, and delicate white sprinkles.
Ingredients
- 48 mini pretzels
- 12 pretzel sticks
- 1 cup pink candy melts
- 1 cup blue candy melts
- 1 cup green candy melts
- 1 cup orange candy melts
- 2 tablespoons white nonpareil sprinkles
- Wax paper or parchment paper
Instructions
- Line a large tray or work surface with wax paper or parchment paper.
- Sort the mini pretzels into 24 matching pairs and break each pretzel stick in half.
- Place each candy melt color in a separate microwave-safe bowl.
- Microwave one bowl of candy melts in 30-second intervals, stirring after each interval until smooth.
- Dip one pretzel-stick half completely into the melted candy and place it on the lined surface.
- Dip one mini pretzel in the same candy coating, gently remove the excess, and place it beside the pretzel-stick body.
- Dip a second mini pretzel and place it on the opposite side to form the second butterfly wing.
- Sprinkle white nonpareils over the wet candy coating.
- Repeat with the remaining pretzels and candy melt colors.
- Let the butterfly pretzels set completely at room temperature or refrigerate them briefly until firm.
- Carefully peel the hardened butterfly pretzels from the paper and serve.
Notes
- If the candy melts thicken while you work, microwave them for a few seconds and stir until smooth again.
- Food tweezers make dipping cleaner, but two small forks also work.
- Let kids choose sprinkle colors and decorate the butterflies while an adult handles warm candy melts.
- Store completely set butterfly pretzels in an airtight container in a cool, dry place for up to one week.
- Prep Time: 25 minutes
- Cook Time: 5 minutes
- Category: Snack
- Method: No-Bake
- Cuisine: American
Nutrition
- Serving Size: 1 butterfly pretzel
- Calories: 152
- Sugar: 15
- Sodium: 132
- Fat: 7
- Saturated Fat: 6
- Unsaturated Fat: 1
- Trans Fat: 0
- Carbohydrates: 21
- Fiber: 0
- Protein: 2
- Cholesterol: 0