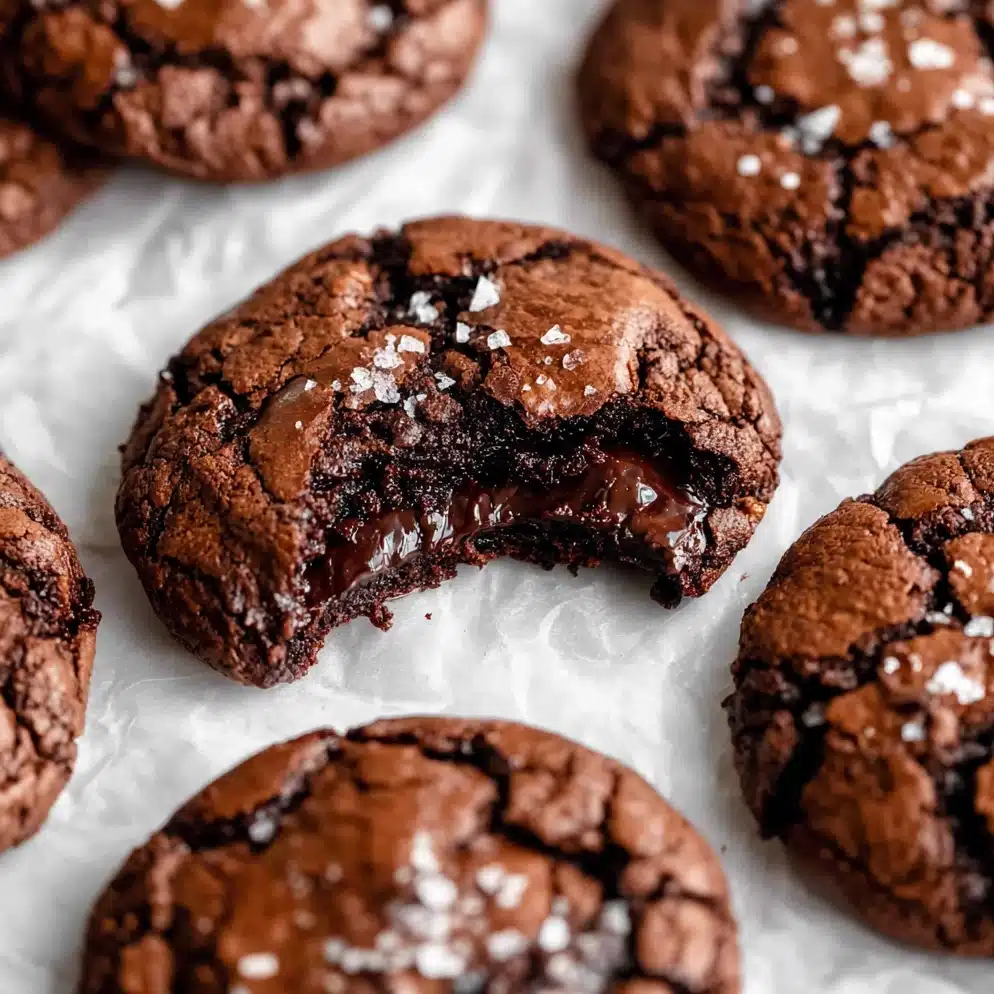
Before we dive into the recipe, here’s a quick overview of what this article covers. You’ll see why fudgy brookies have become a favourite in so many kitchens. We’ll move through the story behind these brownie cookies, the science that makes them so chewy, the baking techniques that guarantee success, the troubleshooting steps bakers often need, and finally the storage and serving ideas that keep this treat irresistible. Each section stays focused, clear, and practical. Let’s get started.
The Story Behind Fudgy Brookies and Why They Matter
Brownie Cookies and Their Charm
The Rise of Chocolate Brookies at Home
I still remember the first time I tasted fudgy brookies, long before I ever thought to write about them. I had baked a tray of brownies the night before and discovered a half-full cookie batter bowl on the counter. Rather than scrap one or the other, I swirled the brownie batter with the cookie mixture and dropped spoonfuls onto a tray. The result surprised me. They baked into chewy, chocolatey clouds with the signature crackly top of a brownie but the round shape and soft centre of a cookie. That day set off a streak of experiments, and my kitchen quickly turned into a brookie test lab.
Even now, I come back to that exact feeling when I write about fudgy brookies. They taste familiar but new. They feel rich yet easy. Whenever I bake a batch, someone always asks for the recipe because they capture that perfect moment between two classic treats. Although brownie cookies have been on café shelves for years, home bakers noticed how achievable they really are. With simple ingredients and smart mixing, these chocolate brookies stay thick, chewy, and deeply flavoured.
This recipe evolved because I wanted a dessert that worked for gatherings, school treats, or late-night cravings. I knew that if the brookies held their shape and stayed soft for days, they’d become the sort of recipe people share. That’s exactly what happened. Friends tasted them, then asked for more, then shared them again. Soon, this fudgy brookie recipe became one of the most requested bakes I’ve ever made. The mix of dark chocolate, sugars, and just the right amount of flour gives them their iconic texture. They remain dependable, even for beginners. And every time I bake them, I feel that same excitement from the first accidental batch.
Print
Fudgy Brookies
- Total Time: 30 minutes
- Yield: 15 cookies 1x
Description
Thick, chocolatey and chewy fudgy brookies with a perfect crackly top.
Ingredients
95 g (¾ cups) plain flour
2 tablespoons cocoa powder
1 teaspoon baking powder
¼ teaspoon salt
225 g (1 ¼ cups) dark chocolate, chopped
56 g (¼ cups) butter
2 eggs, room temperature
100 g (¾ cups) caster sugar
90 g (½ cups) demerara sugar
1 teaspoon vanilla
85 g (½ cups) chocolate chips
Instructions
1. Preheat the oven to 160ºC fan or 170ºC conventional. Line a baking tray with parchment.
2. Melt chocolate and butter over simmering water. Stir in vanilla.
3. Whisk eggs and sugars until thick and fluffy.
4. Sift dry ingredients and add chocolate chips.
5. Fold melted chocolate into egg mixture.
6. Fold dry ingredients into the wet mixture gently.
7. Scoop tablespoons of batter onto tray.
8. Bake 12–14 minutes until crackled and set.
9. Cool 10 minutes on tray, then transfer to rack.
Notes
Use a cookie scoop for even brookies.
Let the chocolate mixture cool slightly before folding.
Do not overmix after adding dry ingredients.
Demerara sugar adds moisture and texture.
- Prep Time: 15 minutes
- Cook Time: 15 minutes
- Category: Dessert
- Method: Baking
- Cuisine: American
Nutrition
- Serving Size: 1 brookie
- Calories: 0
- Sugar: 0
- Sodium: 0
- Fat: 0
- Saturated Fat: 0
- Unsaturated Fat: 0
- Trans Fat: 0
- Carbohydrates: 0
- Fiber: 0
- Protein: 0
- Cholesterol: 0
The Texture Science Behind Thick and Chewy Brookies
Balancing Cocoa, Chocolate, and Sugar
Why Aeration Creates the Crackly Top
The secret behind a great batch of fudgy brookies lies in the textures you build before the dough ever reaches the tray. Although brookies look simple, their success depends on knowing how ingredients behave when combined. You want a dough that stays thick, spreads slightly, and sets into a chewy middle. To make that happen, you need to balance melted chocolate, cocoa powder, and two types of sugar.
Melted dark chocolate contributes depth and richness. Because it cools after mixing, it firms as the brookies rest, creating the dense structure that defines the centre. The cocoa powder boosts flavour without adding too much fat, which keeps the cookies from falling flat. As for sugar, the mix of caster sugar and demerara sugar plays an important role in chewiness. The finer sugar dissolves quickly, supporting the glossy crackly top. The coarse sugar adds moisture retention, which keeps the inside soft for days and gives the edges that gentle crisp.
Even though ingredients matter, technique still holds the final responsibility for success. The whipped eggs create the iconic brownie sheen. This step builds aeration, which helps the tops form crinkles while keeping the centres dense. When you whisk the eggs and sugars until thick and ribbon-like, you trap enough air to allow slight lift without turning the brookies cakey. This step also determines how shiny the final surface becomes.
Once the melted chocolate hits the whipped mixture, the texture begins to change. Folding, rather than beating, maintains the structure. You keep the air inside but still blend the ingredients evenly. The dry mixture follows, and this is the point where many bakers overmix. You want restraint here. Mix just until combined, then stop. This gives you batter that bakes into a chewy brookie rather than a puffy cake cookie. When bakers understand these interactions, they gain full control over texture every single time.
How to Bake Fudgy Brookies That Hold Their Shape
Scoop Size and Baking Temperature
The Importance of Cooling on the Tray
Baking chocolate brookies isn’t difficult, yet precision helps guarantee success. Start with consistent scoop sizes. Using the same amount of batter for each cookie ensures even spreading. It also prevents thinner pieces from overbaking while thicker ones remain underdone. A medium cookie scoop works beautifully because it creates uniform rounds that bake at the same pace. If you prefer larger brookies, increase the baking time by one or two minutes while watching closely for the classic crackled top.
The oven temperature contributes as much to structure as the ingredients themselves. A slightly lower heat helps the brookies cook through while protecting the shiny exterior. Too much heat produces dry edges and a firm centre, but the right temperature keeps everything soft and thick. When you set the oven to 160ºC fan or 170ºC conventional, you create an environment where the brookies rise just enough before setting. That rise produces the attractive glossy finish that signals the perfect brownie-cookie texture.
As soon as the tray comes out of the oven, the brookies continue to cook. That’s why cooling on the baking sheet is essential. If you move them too soon, the warm centres fall apart. The residual heat firms the edges slightly and stabilizes the middle, giving you that ideal chewy bite. Many bakers rush this step, but patience pays off. Ten minutes makes all the difference.
Although you can bake brookies on any lined tray, parchment paper gives you the easiest release. It prevents sticking without adding excess fat or flavour. Once the brookies reach the cooling rack, they relax into their final shape. At this stage the crackles become more defined, the centres set completely, and the texture transforms into something deeply satisfying. With these techniques in place, your brookies stay thick, shiny, and chewy every time.
Troubleshooting Common Brookie Issues
Why Brookies Spread Too Much
How to Fix Dry or Puffy Texture
Even the best bakers face the occasional challenge when making fudgy brookies, but those issues always have clear explanations. When brookies spread more than expected, it often means the mixture became too warm. Melted chocolate retains heat longer than butter alone, so if you combine it with the eggs before letting it cool slightly, the mixture thins. This lighter texture spreads quickly in the oven. To fix this, allow the chocolate mixture to sit for a moment before folding it in. Another cause is under-whisking the eggs. Without enough aeration, the batter lacks structure, which leads to excessive spreading.
Dry or puffy brookies point to the opposite problem. Too much flour makes the dough stiff, and overmixing strengthens the gluten. Both lead to a cakey texture rather than a chewy one. When measuring flour, scoop lightly or weigh precisely. After combining the ingredients, fold only until the last streak of flour disappears. That small adjustment keeps your brookies tender.
Sugar selection also influences dryness. If you skip the demerara sugar and rely only on fine sugar, you lose the moisture-retaining quality the larger crystals offer. This shifts the texture, resulting in a firmer bite. Including both sugars solves the problem effortlessly. Another factor comes from baking time. Brookies continue to cook on the tray, so they must leave the oven soft. If they stay in too long, they crisp rather than stay chewy. Remove them once the tops look crackled and set, even if the centres appear soft.
Although these issues may appear frustrating at first, they are easy to fix. Once you understand how ingredients respond to mixing, heat, and resting, you can adjust any batch. With a few mindful steps, you regain control of texture and flavour, keeping your brookies consistently rich and satisfying.
Serving, Storing, and Freezing Chewy Brookies
Creative Ways to Serve Thick Brookies
Long-Term Storage for Freshness
Once your chewy brookie recipe comes out perfectly, you’ll want to serve them in ways that highlight their chocolatey personality. Brookies taste incredible on their own, but they also shine when warmed slightly and paired with a scoop of ice cream. The warm centre contrasts beautifully with the cool cream, creating a dessert that feels thoughtful without extra effort. You can also crumble brookies over sundaes, layer them into parfaits, or sandwich two together with a swipe of whipped cream for a playful treat.
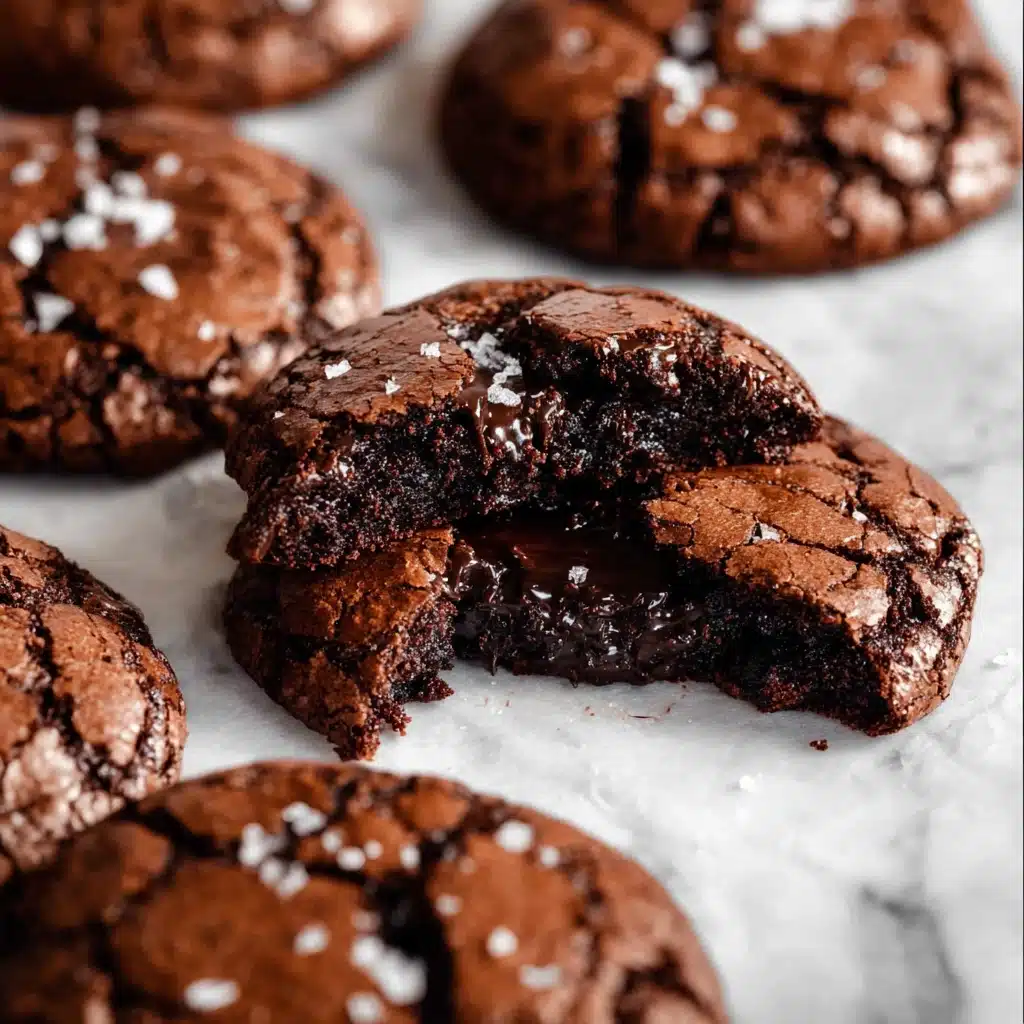
Storing brookies correctly keeps their texture at its best. Because they contain melted chocolate, they resist drying if kept in an airtight container. Store them at room temperature for three to four days, and they remain soft and chewy. If your kitchen runs warm, you may refrigerate them, but bring them back to room temperature before serving to regain their ideal bite.
Freezing is another great option. Place the cooled brookies on a tray and freeze them until firm, then transfer them to a sealed freezer-safe bag. They stay fresh for up to three months. Thaw them at room temperature or warm gently in the oven for a few minutes. This method protects their structure and keeps them ready for last-minute gatherings or sudden cravings.
For long-term meal planning, you can also freeze the dough. Scoop individual portions, freeze until firm, and store them in a bag. When ready to bake, place the frozen scoops on a tray and add one to two extra minutes in the oven. This gives you freshly baked brookies whenever you need them. With thoughtful storage and serving ideas, your brookies remain delicious long after the day you bake them.
FAQ
How do I keep my fudgy brookies soft?
Store them in an airtight container, and the mix of sugars keeps them moist for several days.
Can I use milk chocolate instead of dark chocolate?
Yes. Milk chocolate creates a sweeter brookie, but the texture remains reliable.
Why didn’t my brookies crack on top?
The eggs likely weren’t whisked long enough. The crackly top forms when the mixture gains enough aeration.
Can I add nuts or mix-ins?
Absolutely. Add up to half a cup of chopped nuts or flavoured chips during the dry-ingredient step.
Can I double the recipe?
Yes. The formula scales well, and you can bake multiple trays by rotating them halfway.
Discover more delicious recipes by following me on Facebook and Pinterest.