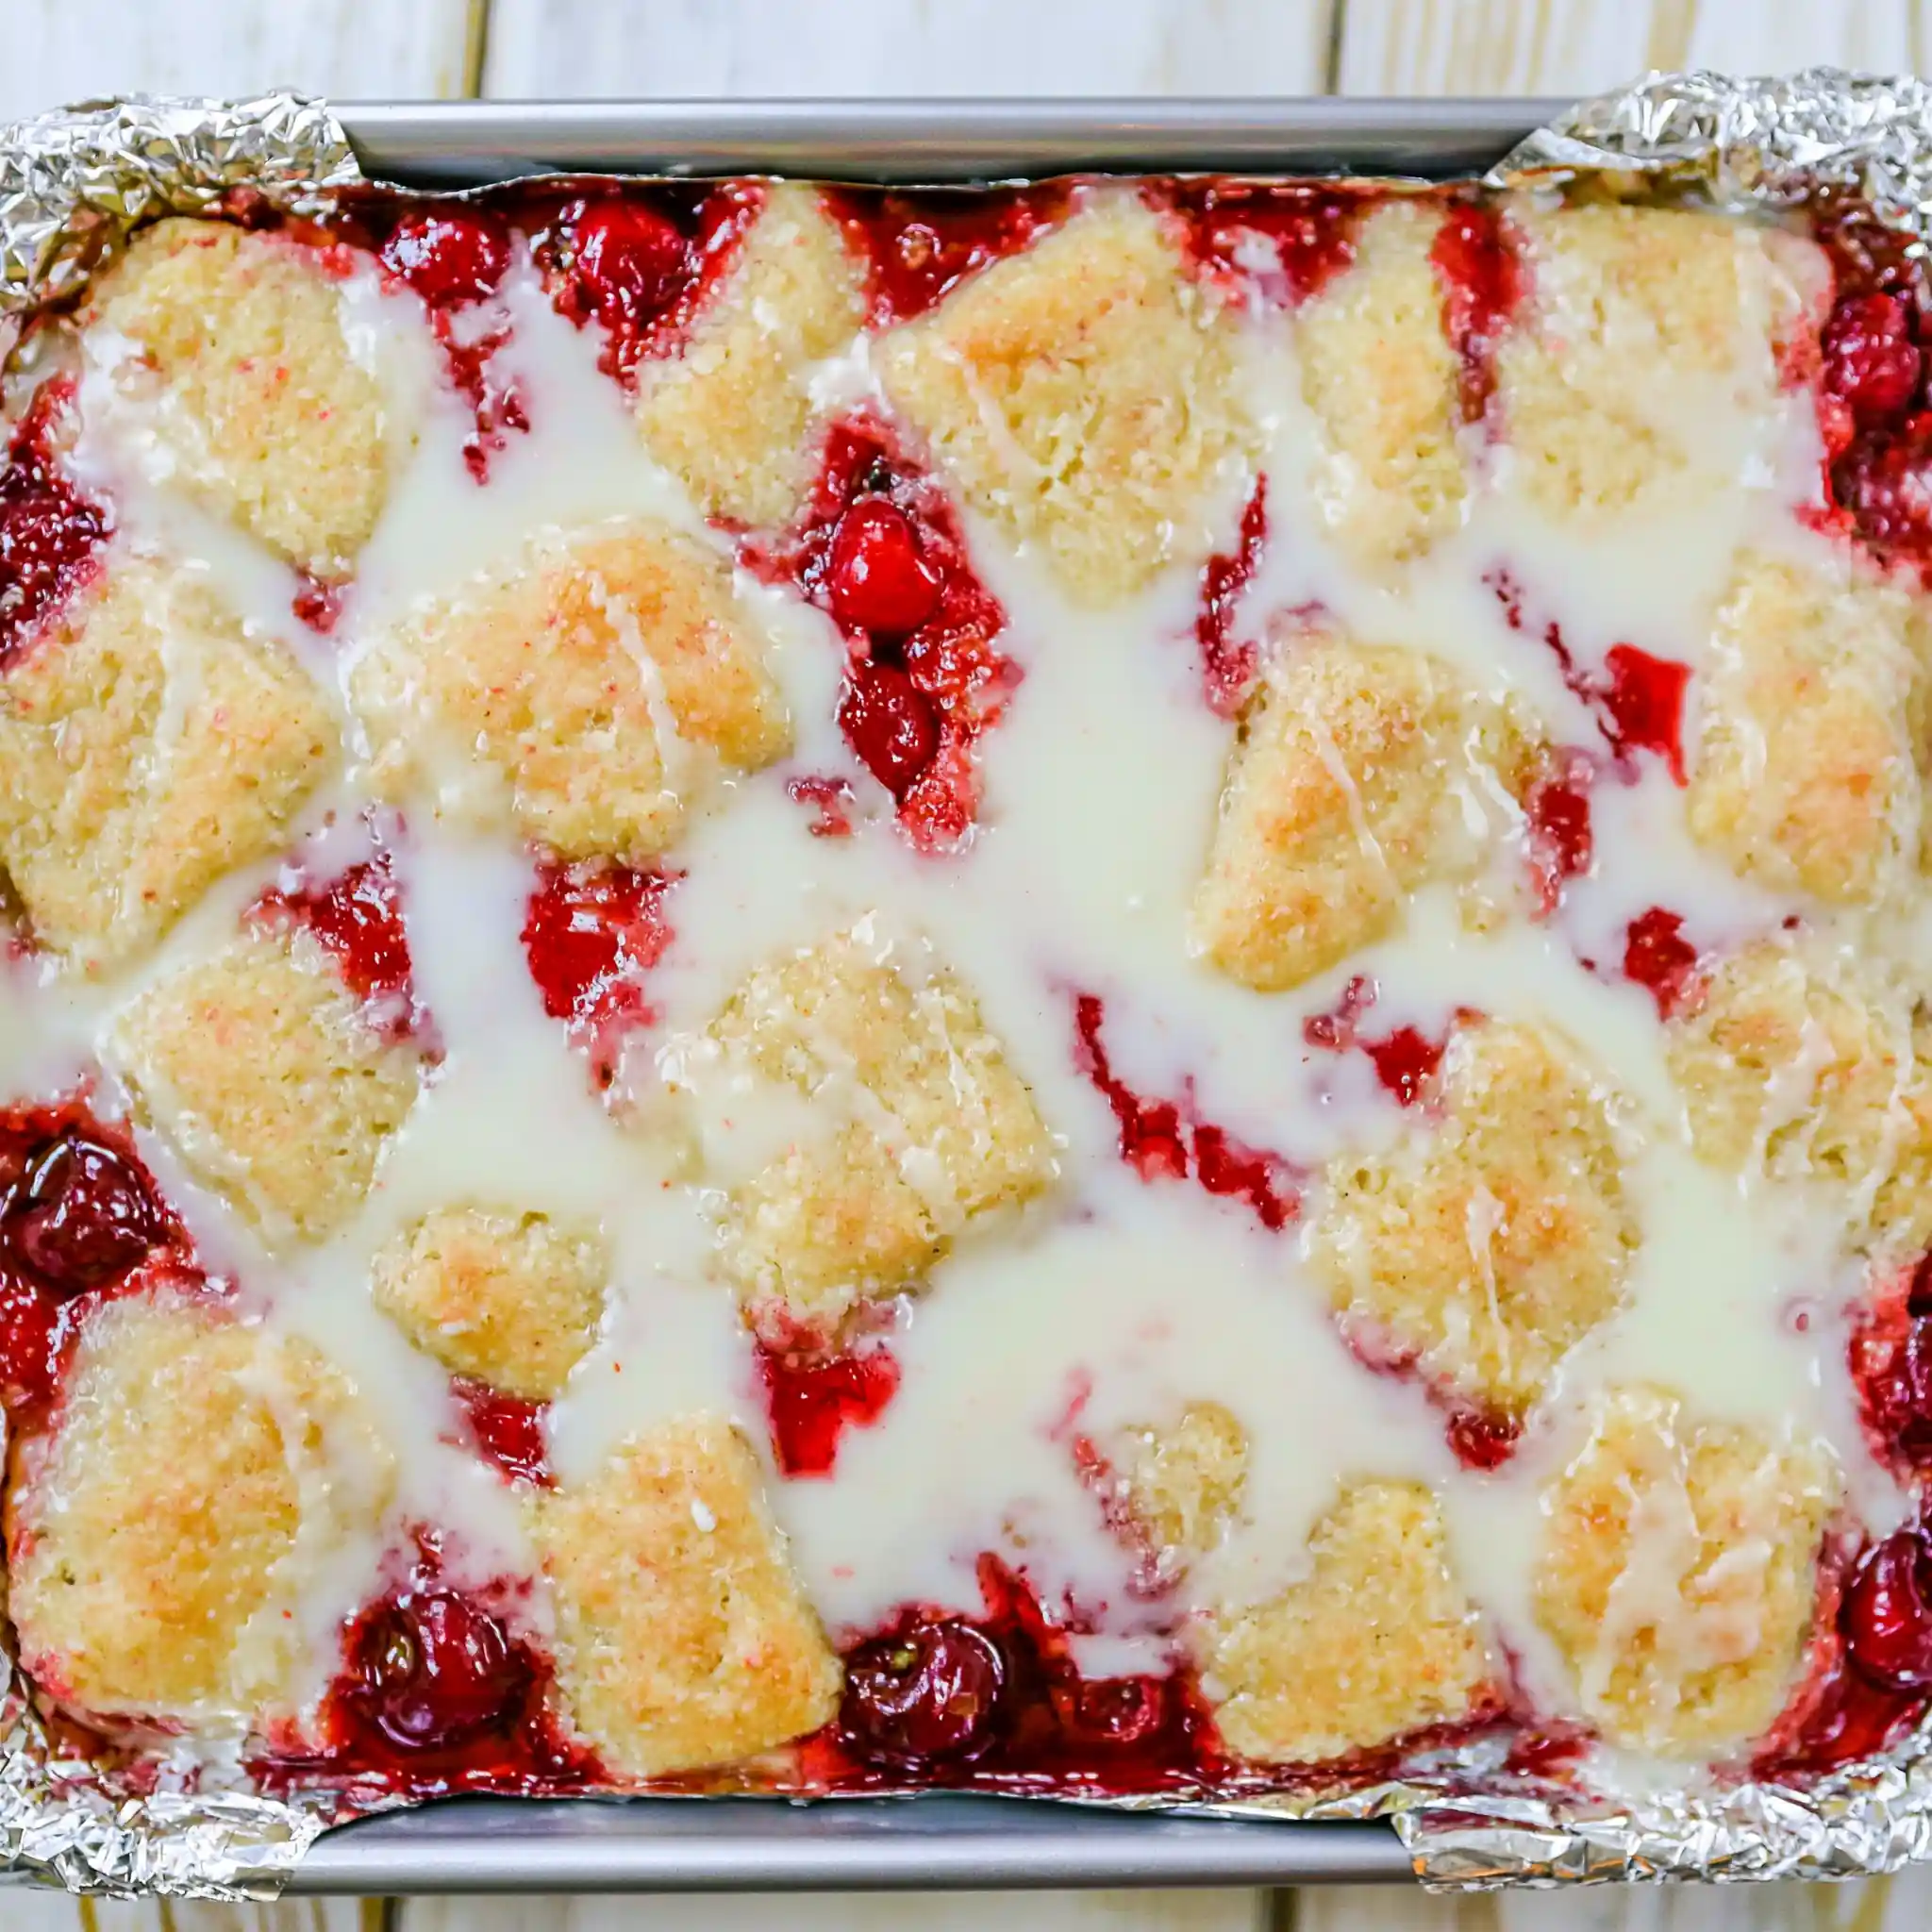
Glazed Cherry Pie Bars bring together soft vanilla-almond batter, sweet cherry pie filling, and a smooth almond glaze in one bright, crowd-friendly pan. These bars bake up tender and fluffy, almost like cloud-like cakes, yet they slice neatly enough for potlucks, brunch tables, bake sales, and family desserts. Because this recipe uses pantry staples and canned filling, you can make it without pitting cherries or rolling pie crust. Better yet, the glossy drizzle gives every square a bakery-style finish. When you need a simple sharing dessert that tastes homemade and looks cheerful, Glazed Cherry Pie Bars always fit the moment.
Story
I first made Glazed Cherry Pie Bars for a casual weekend gathering when I wanted something easier than pie but prettier than a sheet cake. The batter came together in one bowl, the cherry layer spread beautifully across the pan, and the almond glaze made the whole dessert feel special without extra work. Glazed Cherry Pie Bars work well because they balance soft cake, juicy fruit, and a sweet finish in every bite. Unlike traditional cherry pie, Glazed Cherry Pie Bars skip the crust, so you avoid chilling dough, rolling pastry, and worrying about soggy bottoms. Instead, Glazed Cherry Pie Bars bake in a jelly roll pan and serve a generous crowd. Plus, the bars taste great warm, chilled, or at room temperature.
Ingredients
- 1 cup unsalted butter, softened
- 2 cups granulated sugar
- 4 large eggs
- 1 teaspoon vanilla extract
- 1/4 teaspoon almond extract
- 1/2 teaspoon salt
- 3 cups all-purpose flour
- 42 ounces cherry pie filling, about 2 cans
- 1 cup powdered sugar
- 1 teaspoon almond extract, for glaze
- 2 tablespoons milk, plus more as needed
Step-by-Step Instructions
Follow these steps in order so the batter stays fluffy, the cherry layer remains defined, and the glaze drizzles smoothly over the cooled bars. First, preheat the oven to 350°F and coat a 10-by-15-inch jelly roll pan with nonstick cooking spray. Next, make the batter, spread half into the pan, spoon the cherries over the top, and drop the remaining batter in small spoonfuls. Then bake until the center sets and a toothpick comes out clean. Finally, cool the bars briefly and drizzle them with the almond glaze while they still feel slightly warm, but not hot.
Preparing the Ingredients
Soften the butter before you start because room-temperature butter creams more smoothly with sugar and helps create a tender crumb. Measure the flour with a light hand, then level it off so the bars do not turn dense. Crack the eggs into a small bowl first, especially when baking for guests, so you can catch shell pieces before they reach the batter. Open the cherry pie filling and stir it gently to loosen the gelled fruit. Also, whisk the powdered sugar before mixing the glaze, since small lumps can make the drizzle uneven. Lastly, keep extra milk nearby so you can thin the glaze one teaspoon at a time.
Cooking Instructions
Cream the softened butter and sugar in a large mixing bowl until the mixture looks pale and fluffy. Add the eggs one at a time, beating well after each addition, and then mix in the vanilla extract and almond extract. Stir in the flour and salt just until the batter comes together. Spread half of the batter evenly in the prepared jelly roll pan. Spoon the cherry pie filling over the batter without stirring it into the base. Drop tablespoons of the remaining batter randomly over the fruit. Bake for 30 to 35 minutes, or until the top turns lightly golden and a toothpick inserted into the cake portion comes out clean. Mix powdered sugar, almond extract, and milk into a smooth glaze, let the bars cool for 15 minutes, and drizzle the glaze across the top.
Tips for Perfect Results
For the best Glazed Cherry Pie Bars, treat the batter gently and keep the cherry layer separate from the cake layer. A light hand makes the texture soft, while careful layering gives the finished bars their pretty red ribbons. Also, use a jelly roll pan rather than a deep casserole dish because the larger surface area helps the bars bake evenly. If you only have one can of cherry pie filling, you can still make the recipe, although the fruit layer will taste lighter. However, two cans give the fullest cherry flavor and the prettiest slices. Let the bars cool before cutting so the filling settles and the squares hold their shape.
Common Mistakes to Avoid
Do not melt the butter, because melted butter changes the batter texture and can make the bars greasy. Also, avoid overmixing once you add flour, since too much mixing can make the crumb tough instead of tender. Do not stir the cherry filling into the batter; spoon it over the base and leave it in a distinct layer. In addition, avoid glazing the bars straight from the oven, because very hot bars can melt the glaze and make it disappear into the surface. Finally, do not cut the bars too soon. Give them time to cool, and you will get cleaner edges with less filling drag.
Pro Tips for Better Flavor
Almond extract gives these bars their classic bakery-style cherry flavor, so keep it in both the batter and the glaze. However, measure it carefully because almond extract tastes strong. For a brighter finish, add a small pinch of salt to the glaze to balance the sweetness. You can also add a few drops of vanilla to the glaze if you prefer a softer flavor. For cleaner presentation, drizzle the glaze with a spoon, piping bag, or zip-top bag with the corner snipped. Then let the glaze set before stacking or transporting the bars. The result tastes sweet, fruity, and lightly glazed without feeling too heavy.
Serving and Storage
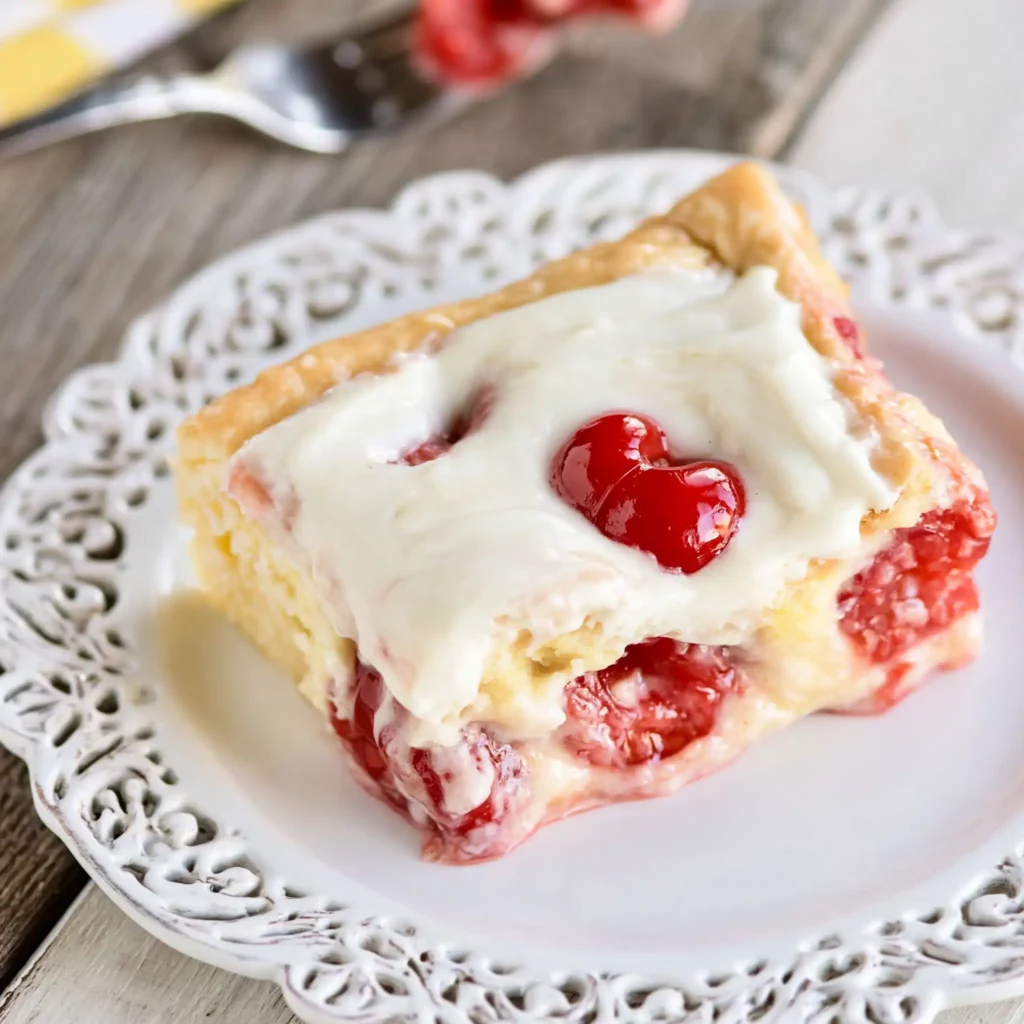
Glazed Cherry Pie Bars serve beautifully for breakfast, dessert, potlucks, holidays, and bake-and-take occasions. Because the bars bake in a large pan, you can cut them into 12 generous portions or smaller squares for a dessert tray. They pair well with hot coffee, iced tea, cold milk, or a scoop of vanilla ice cream. For a brunch table, serve them alongside egg casseroles, fresh fruit, and savory pastries. For dessert, add whipped cream or a dusting of powdered sugar. Since the bars travel well after cooling, they make a practical choice for picnics, school events, church suppers, and family parties.
How to Serve
Let the pan cool until the glaze sets, then cut the bars with a sharp knife. For neat slices, wipe the knife between cuts and use a thin spatula to lift each piece from the pan. Serve the bars at room temperature for the best soft texture and balanced flavor. If you want a warmer dessert, reheat individual bars briefly and add vanilla ice cream. For parties, cut the bars into smaller squares and arrange them on a platter so guests can grab one easily. You can also place each bar in a cupcake liner for bake sales or buffet tables.
How to Store Leftovers
Store leftover Glazed Cherry Pie Bars in an airtight container at room temperature for up to 2 days or in the refrigerator for up to 5 days. Place parchment paper between layers so the glaze does not stick. For longer storage, freeze the cooled, cut bars in a freezer-safe container for up to 2 months. Thaw them in the refrigerator overnight, then bring them to room temperature before serving. If you prefer a fresh-from-the-oven feel, warm individual bars in the microwave for a few seconds. Add a tiny extra drizzle of glaze after reheating if you want the topping to look fresh again.
Conclusion
Glazed Cherry Pie Bars give you the comfort of cherry pie with the ease of a soft sheet-pan dessert. They taste buttery, fruity, and sweet, while the almond glaze adds a polished finish. Because the recipe uses simple ingredients and a straightforward method, you can make it for weekday treats, holiday trays, or any gathering that needs a cheerful dessert. Try these bars when you want something easy to bake, easy to slice, and easy to share.
Discover more delicious recipes by following me on Facebook and Pinterest.
Frequently Asked Questions
Can I Use One Can of Cherry Pie Filling Instead of Two?
Yes, you can use one can of cherry pie filling if that is what you have on hand. The bars will still bake well, but the cherry layer will taste thinner and look less vibrant. For the fullest fruit flavor and the prettiest red swirls, use two cans.
Can I Make Glazed Cherry Pie Bars Ahead of Time?
Yes, these bars make a great make-ahead dessert. Bake them the day before, cool them fully, drizzle the glaze, and store them covered. The flavor settles nicely overnight, and the bars slice cleanly after they have had time to rest.
Can I Use a Different Pie Filling?
Yes, you can swap the cherry filling for blueberry, apple, strawberry, raspberry, or peach pie filling. Keep the same amount and baking time, but watch the center near the end because different fillings can add slightly different moisture levels.
Print
Glazed Cherry Pie Bars
- Total Time: 45 minutes
- Yield: 12 servings 1x
Description
Soft Glazed Cherry Pie Bars made with buttery vanilla-almond batter, sweet cherry pie filling, and a smooth almond glaze. A simple dessert for brunch, potlucks, and sharing.
Ingredients
- 1 cup unsalted butter, softened
- 2 cups granulated sugar
- 4 large eggs
- 1 teaspoon vanilla extract
- 1/4 teaspoon almond extract
- 1/2 teaspoon salt
- 3 cups all-purpose flour
- 42 ounces cherry pie filling, about 2 cans
- 1 cup powdered sugar
- 1 teaspoon almond extract, for glaze
- 2 tablespoons milk, plus more as needed
Instructions
- Preheat the oven to 350°F and spray a 10-by-15-inch jelly roll pan with nonstick cooking spray.
- In a large mixing bowl, cream the softened butter and granulated sugar until light and fluffy.
- Add the eggs one at a time, beating well after each addition.
- Mix in the vanilla extract and 1/4 teaspoon almond extract.
- Add the flour and salt, then mix just until the batter comes together.
- Spread half of the batter evenly into the prepared jelly roll pan.
- Spoon the cherry pie filling over the batter without stirring it into the cake layer.
- Drop tablespoons of the remaining batter randomly over the cherry filling.
- Bake for 30 to 35 minutes, or until the cake portion turns lightly golden and a toothpick inserted into the cake comes out clean.
- While the bars bake, whisk together powdered sugar, 1 teaspoon almond extract, and milk until smooth.
- Let the bars cool for 15 minutes after baking.
- Drizzle the glaze over the warm bars, then cool further before slicing and serving.
Notes
- Do not mix the cherry pie filling into the batter; keep it as a separate fruit layer.
- Use two cans of cherry pie filling for the fullest flavor and best presentation.
- Thin the glaze with extra milk, one teaspoon at a time, until it drizzles easily.
- Cool the bars before cutting for cleaner slices.
- Store leftovers in an airtight container at room temperature for 2 days or in the refrigerator for up to 5 days.
- Prep Time: 10 minutes
- Cook Time: 35 minutes
- Category: Dessert
- Method: Baking
- Cuisine: American
Nutrition
- Serving Size: 1 bar
- Calories: 555
- Sugar: 43
- Sodium: 259
- Fat: 17
- Saturated Fat: 10
- Unsaturated Fat: 6
- Trans Fat: 1
- Carbohydrates: 95
- Fiber: 1
- Protein: 6
- Cholesterol: 96