
Healthy Homemade Fruit Snacks turn colorful fruit and vegetables into chewy, naturally sweet bites that kids can enjoy at snack time. Instead of relying on artificial colors or corn syrup, this recipe combines mango, strawberries, carrot, beet, honey, and gelatin. Therefore, every batch tastes bright and fresh while keeping the ingredient list simple. These little snacks also work well in lunch boxes, after-school snack plates, and family meal prep. Although they look playful, the method requires only blending, blooming gelatin, gentle heating, and chilling. Most importantly, you can adjust the sweetness before the mixture sets.
Story
I started making Healthy Homemade Fruit Snacks after noticing how quickly packaged gummies disappeared from the pantry. I wanted a homemade option that still felt fun, yet I also wanted real fruit at the center of every bite. Soon, mango and carrot became my favorite golden combination, while strawberries and beet created a beautiful ruby-red batch. These hidden veggie fruit snacks surprised me because the vegetables blended smoothly into the fruit instead of dominating the flavor. Moreover, Healthy Homemade Fruit Snacks let me control the sweetness, texture, and ingredients. Now, I make Healthy Homemade Fruit Snacks when I need a colorful make-ahead snack for busy weeks, school lunches, or small hands that appreciate cute shapes.
Ingredients
For the mango-carrot layer, gather 1 1/2 cups diced mango chunks, thawed if frozen; 1 medium carrot, steamed until very soft; 2 tablespoons honey, plus more to taste; 1/4 cup water; and 5 tablespoons grass-fed beef gelatin powder. For the strawberry-beet layer, gather 2 cups halved strawberries; 1 small beet, steamed until very soft; 2 tablespoons honey, plus more to taste; 1/4 cup water; and 5 tablespoons grass-fed beef gelatin powder. These grass-fed gelatin snacks rely on true gelatin powder for their firm, chewy structure. Additionally, keep parchment paper and cooking spray nearby for preparing the loaf pans.
Step-by-Step Instructions
The basic method stays the same for both fruit and vegetable combinations, so you can prepare one flavor first and then repeat the process with the second. First, line a 9-inch loaf pan with parchment paper and lightly coat the surface with cooking spray. Next, blend the chosen fruit, cooked vegetable, water, and honey until extremely smooth. Then, bloom the gelatin directly over the puree before heating. Finally, whisk the mixture gently over medium heat until every gelatin clump dissolves. Pour the smooth puree into the prepared pan and chill it for at least 3 to 4 hours before cutting. For the cleanest texture, however, an overnight chill works especially well.
Preparing the Ingredients
Steam the carrot and beet separately until a fork slides through each vegetable without resistance. Then, cool them slightly before blending. For the golden batch, place mango, steamed carrot, 1/4 cup water, and 2 tablespoons honey in a high-speed blender. Blend for at least 5 minutes, scraping the sides when necessary, until the puree looks silky. Taste and add more honey if needed. Repeat with strawberries, steamed beet, water, and honey for the red batch. Because toddler fruit snacks should have a smooth, easy-to-chew texture, take extra time during blending. Also, remember that honey is not appropriate for children under 12 months; choose an age-appropriate sweetener when preparing DIY baby food snacks for younger children.
Cooking Instructions
Pour one fruit puree into a wide, heavy-bottomed pot. Sprinkle 5 tablespoons gelatin evenly across the entire surface, and then leave it untouched for 5 minutes. The surface will wrinkle as the gelatin blooms. Afterward, place the pot over medium heat and whisk constantly. At first, the mixture may look lumpy. However, continued gentle heat and whisking will dissolve the gelatin. Do not boil the puree because excessive heat can affect the finished texture. Once the mixture looks completely smooth, immediately pour it into the prepared loaf pan. Repeat with the second flavor. Cover and refrigerate for 3 to 4 hours, or preferably overnight. Finally, lift out the firm sheets and cut them with mini cutters or clean kitchen scissors.
Tips for Perfect Results
Smooth puree, properly bloomed gelatin, and controlled heat make the biggest difference in Healthy Homemade Fruit Snacks. Therefore, do not rush the blender or the 5-minute blooming period. A wide pot also helps because the gelatin can spread evenly over the puree instead of collecting in one thick mound. Additionally, taste each fruit mixture before adding gelatin because sweetness becomes harder to adjust afterward. Ripe fruit may need very little extra honey, while tart strawberries may need more. For consistent pieces, cut the chilled sheet into similar sizes. Small pieces feel pleasantly chewy, whereas very thick shapes may seem firmer. Finally, keep finished snacks refrigerated because homemade gelatin treats do not contain commercial stabilizers or preservatives.
Common Mistakes to Avoid
The most common mistake involves adding gelatin and whisking immediately. Instead, let the powder sit undisturbed for the full 5 minutes so it can absorb moisture. Another mistake is allowing the puree to boil. Keep the heat moderate and whisk constantly until the mixture becomes smooth. Also, avoid using vegetables that remain firm after steaming because the blender may leave tiny fibrous pieces behind. Likewise, do not shorten the blending time simply because the puree appears combined after one minute. A long blend creates the smooth texture these snacks need. Finally, resist cutting the mixture before it has fully chilled. If the center still feels soft, return the pan to the refrigerator and give the gelatin more time to set.
Pro Tips for Better Flavor
Choose fragrant, ripe mangoes and naturally sweet strawberries because fruit quality directly shapes the final flavor. Furthermore, taste the puree before blooming the gelatin. If your family regularly eats packaged fruit snacks, add honey gradually until the puree tastes slightly sweeter than you initially expect. Chilling can soften the perception of sweetness. For a brighter strawberry flavor, use deeply red berries with no pale shoulders. Meanwhile, roasting or steaming the beet until completely tender helps its earthy flavor blend gently with the berries. You can also cut each color into different shapes, which makes lunch boxes more playful. Finally, mix the small cutting scraps with the shaped pieces rather than discarding them. The scraps taste exactly as good and make an easy kitchen snack.
Serving and Storage
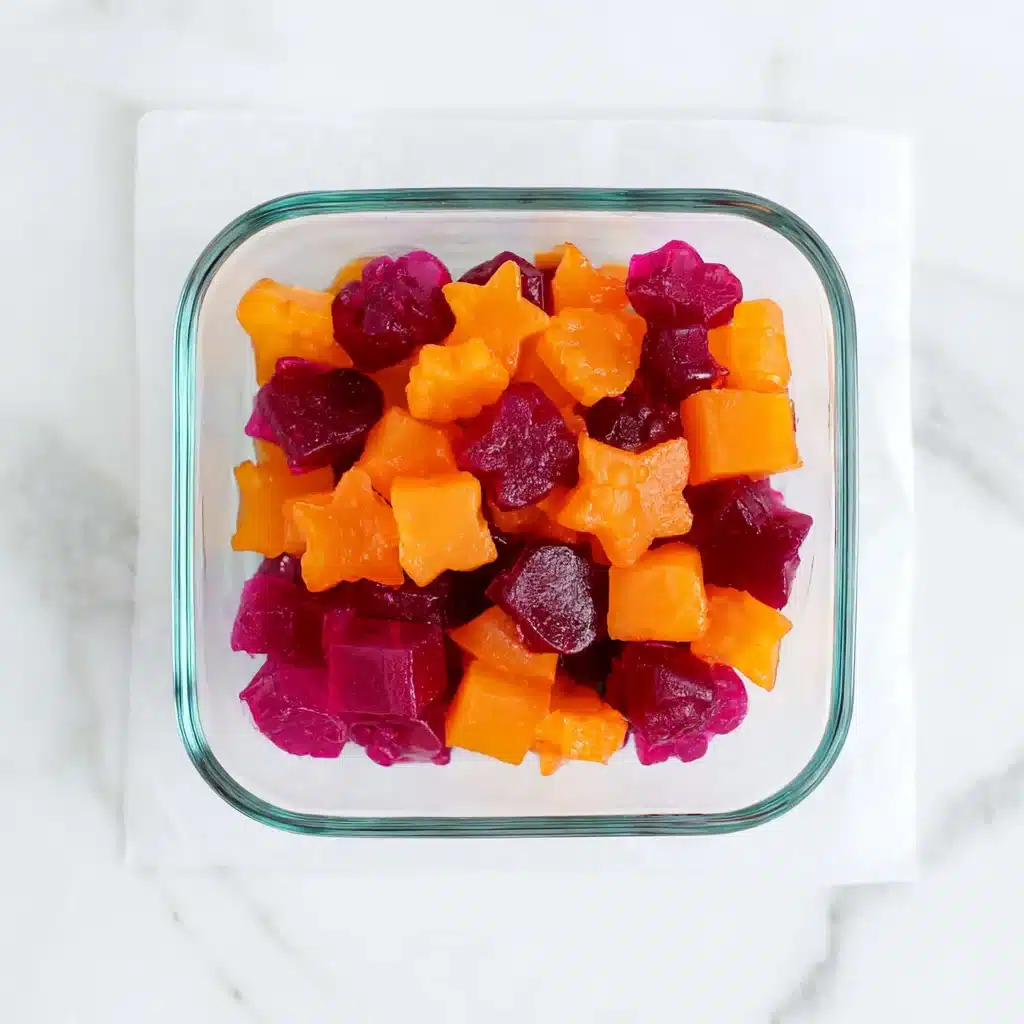
Serve Healthy Homemade Fruit Snacks chilled for the firmest bite, or let them rest briefly at room temperature for a softer chew. Because the recipe creates about 75 small pieces, one batch works nicely for weekly snack prep. Store the pieces in a covered container in the refrigerator and enjoy them within 5 days for the best freshness and texture. If you stack several layers, place parchment paper between them to keep the shapes neat. Additionally, return the container to the refrigerator after serving. These fruit snacks contain fresh produce and lack the preservatives used in many commercial gummies, so cold storage matters. Their bright colors make them especially appealing on snack boards, lunch plates, and packed meals.
How to Serve
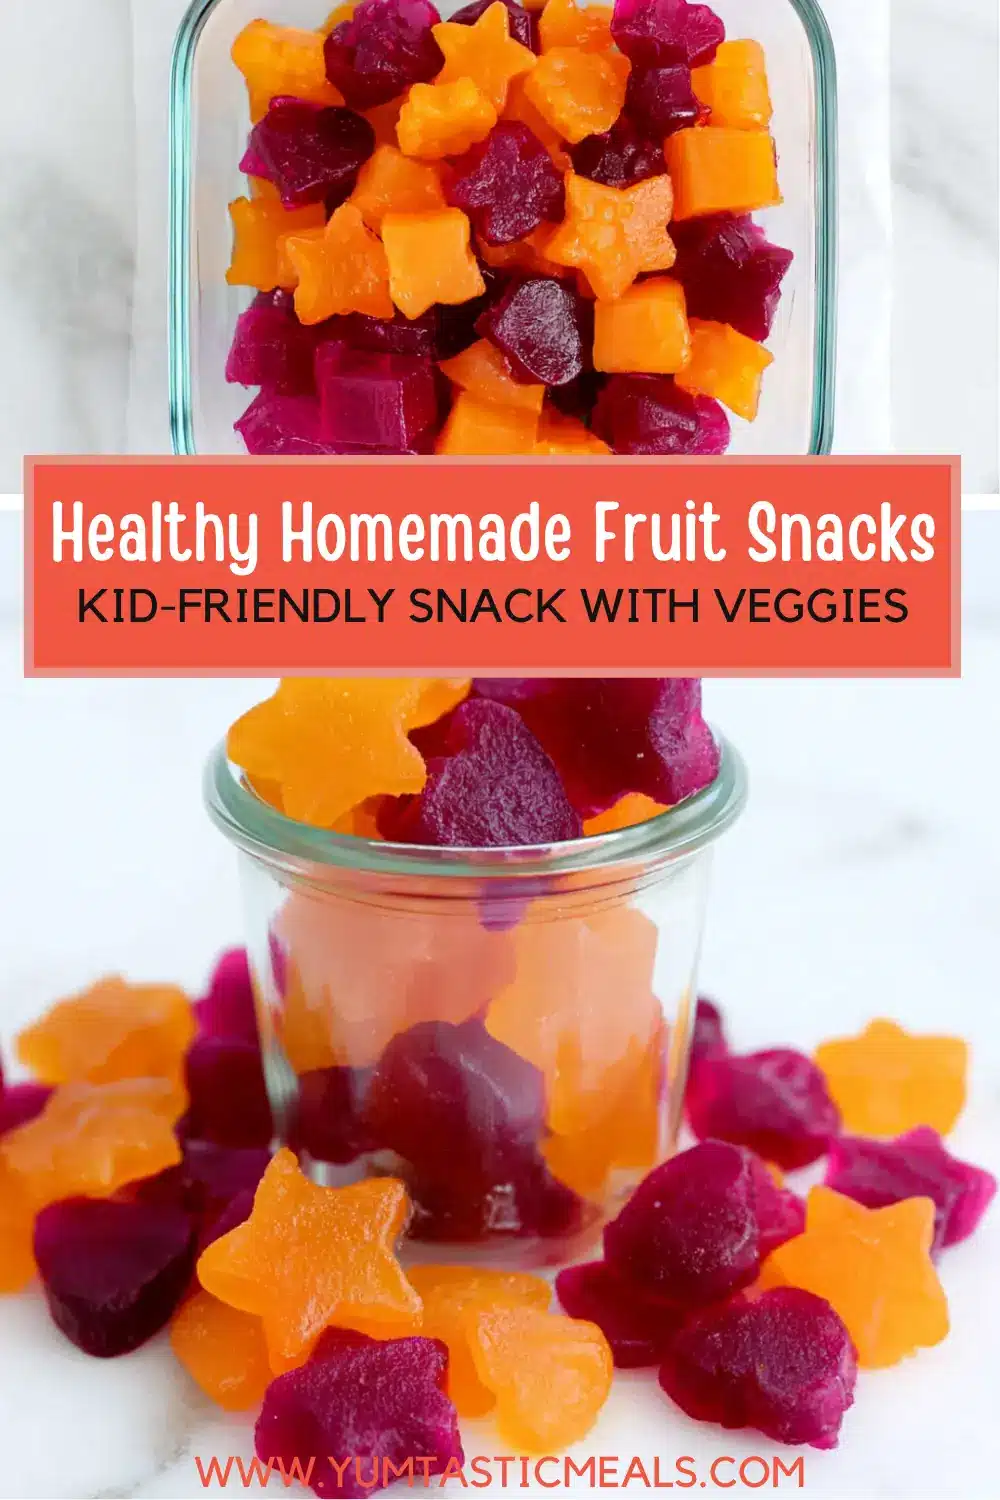
Add a few pieces to a lunch box beside cheese, crackers, or sliced fruit for a colorful snack combination. Alternatively, serve them after school with yogurt or a simple smoothie. Younger children may prefer tiny squares cut with kitchen scissors, while older kids often enjoy stars, hearts, or miniature circles. Because the mango-carrot and strawberry-beet batches have different colors, mixing them creates an especially attractive snack bowl. You can also serve Healthy Homemade Fruit Snacks at playdates or family gatherings when you want a small homemade treat. However, always consider the child’s age and chewing ability before serving gelatin snacks. Cut pieces into an appropriate size and supervise young children while they eat.
How to Store Leftovers
Place completely set fruit snacks in an airtight container and refrigerate them for up to 5 days. Before storing, make sure no excess moisture remains on the pieces because water can make the surfaces slippery. If you cut decorative shapes, arrange them in a single layer or separate stacked layers with parchment paper. Keep the container toward the back of the refrigerator where the temperature stays more consistent. These snacks do not need reheating. Instead, serve them directly from the refrigerator or allow them to soften for a few minutes at room temperature. If the snacks become unusually wet, develop an unpleasant odor, or show signs of spoilage, discard them. For the best texture, prepare only the amount your family can enjoy during the recommended storage period.
Conclusion
Healthy Homemade Fruit Snacks offer a practical way to turn fruit, vegetables, honey, and gelatin into a colorful homemade treat. The mango-carrot version tastes sunny and tropical, while the strawberry-beet version brings bold berry flavor and a naturally rich color. Moreover, the method stays simple once you understand how to bloom and gently dissolve gelatin. Blend carefully, taste the puree, avoid boiling, and give the snacks enough chilling time. Then, cut them into fun shapes and keep them ready in the refrigerator. Try these Healthy Homemade Fruit Snacks for your next lunch box prep or family snack day, and adjust the honey until the sweetness suits your household perfectly.
Discover more delicious recipes by following me on Facebook and Pinterest.
Frequently Asked Questions
The answers below cover the most common questions about texture, sweetness, and ingredient choices. Because homemade fruit snacks use fresh produce, each batch may vary slightly depending on fruit ripeness and water content. Nevertheless, careful blending and correct gelatin handling produce consistent results. Always taste the puree before adding gelatin, and remember that the finished snacks should stay refrigerated. These simple habits help you create smooth, flavorful pieces that hold their shape.
Can I make Healthy Homemade Fruit Snacks without honey?
Yes, you can change the sweetener, although the flavor and sweetness may shift slightly. Maple syrup can work in many homemade fruit snack recipes, while an age-appropriate fruit-based sweetener may suit families preparing snacks for younger children. Never serve honey to babies under 12 months. Regardless of your sweetener choice, add it to the puree before the gelatin so you can blend and taste the mixture thoroughly. Start with a modest amount, taste, and then add more as needed. Naturally ripe mangoes may require less added sweetness than tart berries. Therefore, treat the listed amount as a useful starting point rather than an unchangeable rule.
Why did my homemade fruit snacks turn out lumpy?
Lumps usually appear when the gelatin does not bloom evenly or when the mixture receives too little whisking during gentle heating. Sprinkle the gelatin across the entire puree surface instead of pouring it into one spot. Then, leave it untouched for 5 minutes. Once the surface wrinkles, place the pot over medium heat and whisk constantly. The mixture may initially look clumpy, but the gelatin should gradually dissolve as it warms. Do not increase the heat aggressively or allow the puree to boil. Instead, continue whisking patiently until the texture looks completely smooth. A smooth fruit puree also matters, so blend the fruit and vegetables for the full recommended time before starting the gelatin process.
Can I use different fruits and vegetables?
Yes, but fruit chemistry and moisture levels can change how gelatin sets. For the most predictable result, start with the mango-carrot and strawberry-beet combinations in this recipe. After you master the method, try other smooth fruit and cooked vegetable pairings in small test batches. Keep the puree thick rather than watery, and taste it before adding gelatin. Some fresh fruits contain enzymes that can interfere with gelatin, so heating becomes particularly important when working with certain varieties. Therefore, do not assume every raw fruit puree will behave exactly the same. When testing a new combination, maintain the same careful blooming process, gentle cooking method, and full chilling period before deciding whether the gelatin ratio needs adjustment.
Healthy Homemade Fruit Snacks
- Total Time: 30 minutes
- Yield: 75 pieces 1x
- Diet: Gluten Free
Description
Colorful homemade fruit snacks made with pureed fruit, hidden vegetables, honey, and grass-fed beef gelatin for a chewy kid-friendly snack.
Ingredients
- 1 1/2 cups diced mango chunks, thawed if frozen
- 1 medium carrot, steamed until soft
- 2 tablespoons honey, plus more to taste
- 1/4 cup water
- 5 tablespoons grass-fed beef gelatin powder
- 2 cups halved strawberries
- 1 small beet, steamed until soft
- 2 tablespoons honey, plus more to taste
- 1/4 cup water
- 5 tablespoons grass-fed beef gelatin powder
Instructions
- Line a 9-inch loaf pan with parchment paper and lightly coat it with cooking spray.
- Place the chosen fruit and steamed vegetable in a high-speed blender.
- Add the water and honey, then blend for at least 5 minutes until extremely smooth.
- Taste the puree and add more honey if needed, then blend again.
- Pour the puree into a wide, heavy-bottomed pot and sprinkle the gelatin evenly over the surface.
- Leave the gelatin untouched for 5 minutes until the surface looks wrinkled.
- Place the pot over medium heat and whisk constantly until the gelatin dissolves and the mixture becomes completely smooth. Do not boil.
- Pour the smooth mixture into the prepared loaf pan.
- Repeat the process with the second fruit and vegetable combination.
- Cover and refrigerate for at least 3 to 4 hours, or overnight for the firmest texture.
- Lift the set fruit snack sheet from the pan and cut it into small shapes with mini cutters or kitchen scissors.
- Store the finished fruit snacks in the refrigerator for up to 5 days.
Notes
- Add more honey to taste if your family prefers sweeter fruit snacks.
- Do not serve honey to children under 12 months.
- Bloom the gelatin for the full 5 minutes before heating.
- Do not allow the fruit and gelatin mixture to boil.
- Keep the finished fruit snacks refrigerated.
- Prep Time: 20 minutes
- Cook Time: 10 minutes
- Category: Snack
- Method: Stovetop
- Cuisine: American
Nutrition
- Serving Size: 1 piece
- Calories: 14
- Sugar: 2
- Sodium: 3
- Fat: 0
- Saturated Fat: 0
- Unsaturated Fat: 0
- Trans Fat: 0
- Carbohydrates: 2
- Fiber: 0
- Protein: 1
- Cholesterol: 2