
These Homemade Granola Bars combine chewy oats, crispy rice cereal, graham cracker pieces, mini chocolate chips, and sweet cereal marshmallows in every bite. Better yet, you can prepare the entire batch without turning on the oven. A warm honey and brown sugar mixture binds everything together, while a long refrigerator chill gives the bars a firm yet tender texture. Because this recipe makes 16 portions, it works beautifully for lunchboxes, after-school treats, road trips, or busy mornings. Once you learn this simple method, you can prepare flavorful snack bars at home whenever your family needs a quick grab-and-go option.
Story
I started making Homemade Granola Bars because packaged snacks disappeared quickly in our house, yet everyone wanted something different. Some preferred chocolate, while others asked for crispy cereal or marshmallows. This recipe brings those favorites together in one easy pan. Unlike many baked bars, these Homemade Granola Bars stay pleasantly chewy because the oats never dry out in the oven. Instead, a bubbling mixture of butter, brown sugar, and honey coats the dry ingredients and creates a dependable binder. The graham crackers add a warm, lightly toasted flavor that pairs naturally with chocolate and marshmallows. Meanwhile, crispy rice cereal gives every bar a light crunch without making it hard. These no bake granola bars also require only a saucepan, a mixing bowl, and an 8-inch square pan. Therefore, cleanup stays manageable. Although the active preparation takes about 20 minutes, the bars need two hours in the refrigerator before slicing. That resting time matters because it lets the binder firm around the oats and cereal. As a result, the finished Homemade Granola Bars hold together while remaining soft enough for children to enjoy.
Ingredients
- 6 tablespoons unsalted butter
- 6 tablespoons packed brown sugar
- 2/3 cup honey
- 3 cups rolled oats
- 1 1/2 cups crispy rice cereal
- 1/2 cup graham crackers, broken into small pieces and crumbs
- 1/2 teaspoon salt
- 1/2 cup mini chocolate chips
- 1/2 cup cereal marshmallows
- Vegetable oil spray or baking spray, for the pan
Step-by-Step Instructions
This recipe moves quickly once the honey mixture starts bubbling, so measure every ingredient before heating the saucepan. First, prepare the pan and combine the dry ingredients. Next, cook the binder for exactly two minutes, then stir it into the oat mixture. After the mixture cools, fold in the chocolate chips and marshmallows. Finally, press everything firmly into the pan and refrigerate the slab until it becomes easy to slice.
Preparing the Ingredients
Lightly coat an 8-by-8-inch pan with vegetable oil spray or baking spray. Cut a square of parchment paper to cover the bottom, then place it inside the pan. Measure the rolled oats and crispy rice cereal into a large mixing bowl. Break the graham crackers into small pieces, leaving a mixture of visible chunks and fine crumbs, and add them to the bowl with the salt. Measure the mini chocolate chips and cereal marshmallows into separate small bowls so they remain ready for later. Keeping these delicate mix-ins separate prevents the warm binder from melting the chocolate or softening the marshmallows too early. Finally, keep a sturdy spatula nearby for mixing and pressing.
Cooking Instructions
Add the butter, packed brown sugar, and honey to a small saucepan. Place the pan over medium heat and whisk until the butter melts and the mixture begins bubbling evenly. Once it bubbles, cook it for exactly two minutes while whisking often. Immediately pour the hot syrup over the oat, cereal, graham cracker, and salt mixture. Stir carefully until the syrup coats every dry pocket. Let the mixture cool for about 20 minutes, stirring once or twice to release excess heat. Gently fold in the mini chocolate chips and cereal marshmallows. Transfer the mixture to the prepared pan, spread it into the corners, and press it into an even, compact layer. Refrigerate for two hours. Lift out the chilled slab, place it on a cutting board, and slice it into 16 bars with a sharp knife.
Tips for Perfect Results
The texture of Homemade Granola Bars depends on three key details: cooking the binder long enough, cooling the mixture before adding chocolate, and pressing the bars firmly into the pan. The syrup needs a full two-minute simmer so it can hold the oats together after chilling. However, the oat mixture must cool before the chocolate and marshmallows go in. Otherwise, both ingredients may melt. Finally, use steady pressure when packing the pan because loose areas often crumble during slicing. These small habits produce clean, chewy bars with an even mix of oats, cereal, chocolate, and marshmallows.
Common Mistakes to Avoid
Do not remove the honey mixture from the heat as soon as the first bubble appears. Instead, begin timing once the entire surface bubbles, then cook it for two full minutes. At the same time, avoid cooking it much longer because overcooked sugar can create hard bars. Another common mistake involves adding chocolate chips while the oat mixture remains hot. Melted chocolate tastes delicious, but it can streak through the bars and change their appearance. Also, do not stir aggressively after adding the cereal marshmallows because they may break apart. Most importantly, do not skip the chilling period. Bars cut too early often bend, stick to the knife, or crumble around the edges.
Pro Tips for Better Flavor
Toast the rolled oats in a dry skillet for several minutes before mixing if you prefer a deeper, nuttier flavor. Let them cool before continuing with the recipe. You can also add one teaspoon of vanilla extract to the honey mixture after removing it from the heat. For a stronger s’mores flavor, replace part of the crispy rice cereal with extra graham cracker pieces. Additionally, sprinkle a tablespoon of mini chocolate chips across the top before pressing the mixture for an attractive finish. A small pinch of cinnamon adds warmth, while flaky salt creates a pleasant sweet-and-salty contrast. For neat slices, chill the bars thoroughly and wipe the knife between cuts.
Serving and Storage
These Homemade Granola Bars taste chewy and tender directly from the refrigerator, although they soften slightly after several minutes at room temperature. Because the recipe includes butter and a generous honey binder, the bars hold their shape best when kept cool. You can wrap them individually for quick snacks or arrange them on a platter for parties. Their combination of familiar flavors makes them especially useful as kid friendly granola for family events, picnics, and casual gatherings.
How to Serve
Serve each bar on its own for a sweet afternoon snack, or pair it with fresh fruit and yogurt for a more filling breakfast. These chewy chocolate chip granola bars also fit neatly into lunch containers when wrapped in parchment or reusable food wrap. For dessert, drizzle the bars with melted chocolate or serve them beside cold milk. You can cut the slab into 16 standard bars, 12 larger rectangles, or 24 small squares for a party tray. Let refrigerated bars sit at room temperature for five minutes when you prefer an extra-soft bite.

How to Store Leftovers
Place the bars in an airtight container with parchment paper between layers. Store them in the refrigerator for up to one week. For lunchboxes, keep the wrapped bars beside a cold pack so they remain firm. You may also freeze them for up to two months. First, wrap each bar tightly in parchment or plastic wrap. Next, place the wrapped bars in a freezer-safe container. Thaw a frozen bar in the refrigerator overnight or leave it at room temperature for about 20 minutes. Avoid microwaving the bars because the marshmallows and chocolate can melt before the center softens evenly.
Conclusion
These Homemade Granola Bars turn basic pantry ingredients into a chewy, crispy, chocolate-filled snack that both children and adults can enjoy. The recipe requires little active work, no oven, and plenty of room for personal touches. Prepare a batch on the weekend, chill it thoroughly, and keep the sliced bars ready for breakfasts, lunchboxes, and afternoon cravings. Once you taste the combination of honey-coated oats, graham crackers, mini chocolate chips, and marshmallows, these bars may become one of your most requested school snacks.
Discover more delicious recipes by following me on Facebook and Pinterest.
Frequently Asked Questions
Can I Make These Homemade Granola Bars Without Marshmallows?
Yes, you can leave out the cereal marshmallows without changing the cooking method. Replace them with another half cup of mini chocolate chips, raisins, dried cranberries, chopped pretzels, toasted coconut, or finely chopped nuts. Keep the total quantity of added mix-ins close to one cup. Too many additions can prevent the honey mixture from coating the oats properly, which may create crumbly bars. When adding dried fruit, chop large pieces so they spread evenly throughout the pan.
Why Are My No-Bake Granola Bars Falling Apart?
Granola bars usually crumble when the binder cooks for too little time, the mixture contains too many dry ingredients, or the bars were not pressed firmly enough. Bring the butter, brown sugar, and honey to a steady bubble before starting the two-minute timer. Then coat the dry ingredients thoroughly and pack the mixture firmly into every corner of the pan. Chill the slab for the full two hours before slicing. Additionally, use rolled oats rather than thick extra-large oats, which may resist the binder.
Can I Use Quick Oats Instead of Rolled Oats?
You can replace some or all of the rolled oats with quick oats, although the texture will change. Quick oats absorb the warm binder faster and create softer, denser bars. Rolled oats provide a more noticeable chew and a traditional granola-bar appearance. For balanced results, use two cups of rolled oats and one cup of quick oats. Avoid instant oatmeal packets because they often contain added sugar, flavoring, and powdered ingredients that may alter the consistency of the bars.

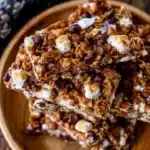
Homemade Granola Bars
- Total Time: 20 minutes
- Yield: 16 bars 1x
- Diet: Vegetarian
Description
Chewy no-bake homemade granola bars made with rolled oats, crispy rice cereal, graham crackers, mini chocolate chips, and cereal marshmallows. They make an easy kid-friendly snack for lunchboxes, busy mornings, and after-school cravings.
Ingredients
- 6 tablespoons unsalted butter
- 6 tablespoons packed brown sugar
- 2/3 cup honey
- 3 cups rolled oats
- 1 1/2 cups crispy rice cereal
- 1/2 cup graham crackers, broken into small pieces and crumbs
- 1/2 teaspoon salt
- 1/2 cup mini chocolate chips
- 1/2 cup cereal marshmallows
- Vegetable oil spray or baking spray, for the pan
Instructions
- Lightly coat an 8-by-8-inch pan with vegetable oil spray or baking spray, then line the bottom with parchment paper.
- Add the rolled oats, crispy rice cereal, graham cracker pieces, and salt to a large mixing bowl.
- Place the butter, brown sugar, and honey in a small saucepan over medium heat.
- Whisk until the mixture bubbles evenly, then cook for exactly 2 minutes while whisking often.
- Immediately pour the hot honey mixture over the dry ingredients and stir carefully until everything receives an even coating.
- Let the oat mixture cool for about 20 minutes.
- Gently fold in the mini chocolate chips and cereal marshmallows.
- Transfer the mixture to the prepared pan and press it into a firm, even layer.
- Refrigerate the bars for 2 hours, or until completely firm.
- Lift the slab from the pan and cut it into 16 bars with a sharp knife.
Notes
- Measure every ingredient before heating the binder because the cooking process moves quickly.
- Begin the two-minute timer only after the honey mixture bubbles across the surface.
- Let the oat mixture cool before adding the chocolate chips and marshmallows.
- Press the mixture firmly into the pan so the finished bars hold together.
- Store the bars in an airtight container in the refrigerator for up to 1 week.
- Freeze individually wrapped bars for up to 2 months.
- Prep Time: 10 minutes
- Cook Time: 10 minutes
- Category: Snack
- Method: No-Bake
- Cuisine: American
Nutrition
- Serving Size: 1 bar
- Calories: 210
- Sugar: 21
- Sodium: 113
- Fat: 7
- Saturated Fat: 4
- Unsaturated Fat: 3
- Trans Fat: 0.2
- Carbohydrates: 36
- Fiber: 2
- Protein: 3
- Cholesterol: 12