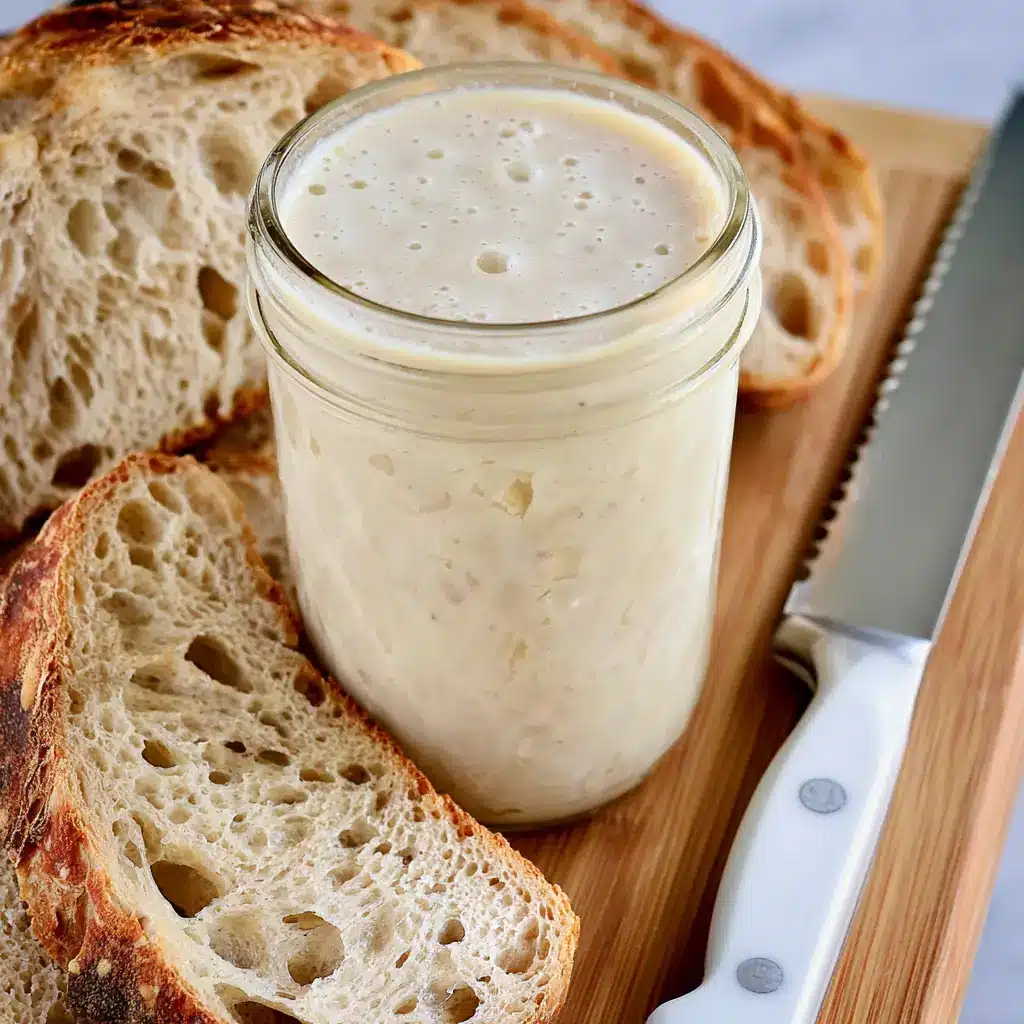
A sourdough starter turns two basic ingredients into a living culture that can raise flavorful homemade bread. Although the process takes several days, each daily task requires only a few minutes. You simply mix flour and non-chlorinated water, let natural microorganisms grow, and refresh the mixture through regular feedings. This sourdough starter recipe uses equal weights for simple measuring and dependable consistency. Once the culture becomes bubbly, fragrant, and strong enough to double after feeding, you can use it for bread, rolls, pancakes, crackers, and more. With patience and a steady routine, even a new baker can create a healthy starter from scratch.
Story
When I began bread making, maintaining a bubbling jar on the counter sounded far more complicated than mixing ordinary dough. However, the first batch quickly changed my mind. A sourdough starter needs attention, but it does not demand advanced baking skills. Flour already carries wild yeast and friendly bacteria, while water creates the environment they need to multiply. Over several days, regular feedings build a balanced culture with enough strength to raise dough. Unlike sourdough with yeast from a packet, traditional starter relies on naturally occurring yeast. Therefore, the flavor develops slowly and gains more character. This method also makes homemade sourdough approachable because every feeding uses the same flour-to-water ratio. As the starter matures, you will notice bubbles, a pleasantly tangy aroma, and steady growth after feeding. Those changes show that fermentation has begun. Still, early bubbles do not always mean the culture can bake bread yet. A reliable sourdough starter should rise predictably for several consecutive feedings. Consequently, patience matters more than speed. This easy sourdough routine usually creates a strong culture within seven to fourteen days.
Ingredients
- 50 grams all-purpose or bread flour, about ½ cup, plus more for each feeding
- 50 grams room-temperature non-chlorinated water, about ¼ cup, plus more for each feeding
Step-by-Step Instructions
Follow the same measuring and feeding routine each day, but watch the starter rather than relying only on the calendar. Room temperature, flour choice, and water quality can change how quickly fermentation develops. A warm kitchen usually produces faster activity, while a cool room may add several days. Keep the jar away from direct sunlight, ovens, and strong heat sources. Furthermore, use clean utensils whenever you stir or feed the culture.
Preparing the Ingredients
Choose a clean glass jar that holds at least two cups so the sourdough starter has enough room to rise without overflowing. Place the jar on a digital kitchen scale, then reset the scale to zero. Add 50 grams of flour and 50 grams of room-temperature non-chlorinated water. If you do not own a scale, measure about ½ cup flour and ¼ cup water, although weight provides better accuracy. Stir until no dry flour remains. The mixture should resemble a thick pancake batter or soft paste. Scrape down the sides so you can clearly track growth. Next, mark the mixture’s starting level with a rubber band or washable marker. Cover the jar loosely with its lid, a coffee filter, or cheesecloth. Do not seal it tightly because fermentation creates gas.
Cooking Instructions
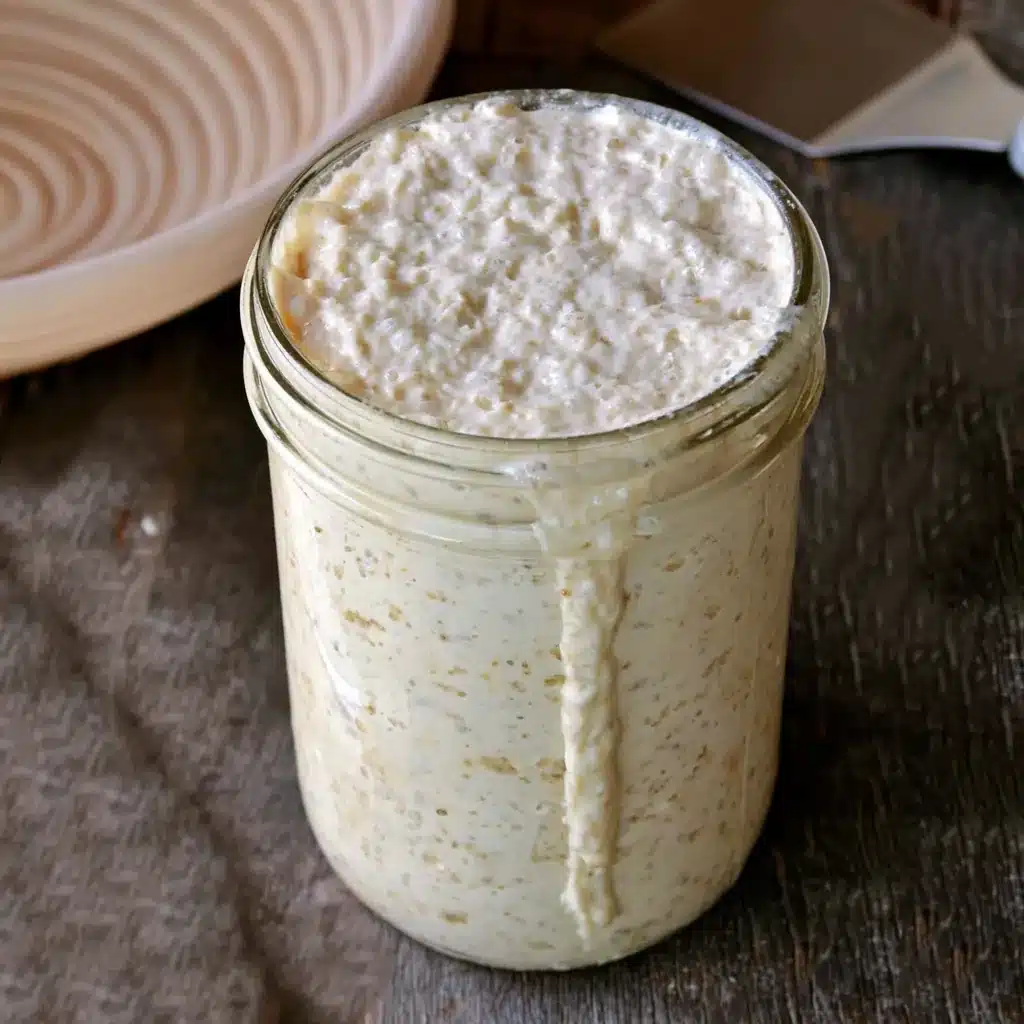
Leave the mixture at room temperature for 24 hours. On the second day, add another 50 grams flour and 50 grams water, then stir thoroughly. Cover loosely and rest for another 24 hours. You may notice bubbles, but the sourdough starter may also appear quiet. Before the next feeding, remove and discard half of the mixture. Then add 50 grams flour and 50 grams water. Stir, mark the level, cover, and rest again. Continue feeding every 24 hours, discarding half before every second feeding, until the culture gains steady strength. If the starter rises and falls within twelve hours, begin feeding every twelve hours. Continue this schedule for at least seven days and possibly fourteen. The sourdough starter becomes ready when it doubles within four to eight hours after feeding for several cycles. You may also try the float test by dropping a small spoonful into water. A floating sample can indicate trapped gas, although consistent doubling offers the more dependable sign.
Tips for Perfect Results
Successful fermentation depends on consistency more than complicated technique. Feed the sourdough starter at roughly the same time, use the same flour when possible, and keep the jar in a stable location. A temperature near 70°F to 78°F supports steady activity. Moreover, mark the starter’s level immediately after every feeding. That simple mark helps you identify its peak, even if it rises and falls while you sleep or work. Write down feeding times during the first week so you can spot patterns.
Common Mistakes to Avoid
Do not use heavily chlorinated water because chlorine can slow microbial activity. Filter tap water or leave it uncovered overnight before mixing. Likewise, do not place the jar in direct heat. High temperatures can weaken the culture or encourage unwanted growth. Avoid feeding without discarding for many days because the jar will become crowded, acidic, and difficult to maintain. However, do not panic when activity slows after an energetic second or third day. Early bacterial activity often creates a temporary burst before the stable yeast population develops. Continue feeding. Never use starter that shows pink or orange streaks, fuzzy mold, or a rotten odor. Discard the entire batch, clean the jar thoroughly, and begin again. Finally, do not bake with a young sourdough starter simply because it contains bubbles. Wait for reliable doubling and a clean, tangy smell.
Pro Tips for Better Flavor
Whole wheat or rye flour can help a sluggish sourdough starter because these flours contain more minerals and microorganisms than refined flour. Replace half of one feeding’s white flour with whole-grain flour, then watch the response. Additionally, use slightly warm water in a cool kitchen, but keep it below 90°F. Stir vigorously during feeding to distribute food and introduce oxygen. Once the culture matures, adjust the feeding ratio to match your schedule. For example, one part starter, two parts water, and two parts flour gives the culture more food and may lengthen the time before it peaks. Although many bakers name their starters for fun, the most useful habit involves learning the culture’s aroma and rise pattern. A healthy starter often smells mildly tangy, fruity, yeasty, or similar to yogurt. Therefore, observe it daily and let its behavior guide your routine.
Serving and Storage
A sourdough starter does not function as a finished dish, but it becomes the natural leavening base for many baked recipes. Keep enough active culture for your planned bake, then maintain a smaller amount to reduce flour waste. Since different bread recipes require different quantities, check the recipe before feeding. Build the amount you need while keeping the flour and water weights equal unless your bread formula states otherwise.
How to Serve
Use active sourdough starter when it reaches its peak, which usually occurs after it doubles and before the center collapses. At that stage, the mixture should look airy and filled with bubbles. Spoon the required amount into your bread dough, then feed the starter that remains in the jar. You can also use unfed discard in recipes that do not depend on it for the main rise. Pancakes, waffles, crackers, muffins, flatbreads, and quick breads all work well. This flexibility makes a starter valuable even between bread-baking days. For the strongest rise, however, use freshly fed starter that has reached a predictable peak.
How to Store Leftovers
Keep the sourdough starter at room temperature when you bake frequently, and feed it every twelve to twenty-four hours based on how quickly it rises and falls. For occasional baking, feed the culture, let it begin rising for one or two hours, then place it in the refrigerator with a loosely fitted lid. Feed a refrigerated starter about once each week. Before baking, remove it from the refrigerator and let it reach room temperature. Discard part, feed it, and repeat feedings until it doubles strongly within four to eight hours. This revival may require one feeding or several. If a gray liquid forms on top, stir it in for a sharper flavor or pour it away before feeding. As long as the starter has no colored streaks or mold, regular feedings can often restore it.
Conclusion
Making a sourdough starter from scratch requires flour, water, a jar, and a little patience. Although the culture may change from one day to the next, regular feeding gradually builds the wild yeast needed for bread. Watch for predictable doubling, a pleasant fermented aroma, and plenty of bubbles rather than expecting an exact finish date. Once your starter becomes active, you can maintain it for years with a simple feeding routine. Start your jar today, track its progress, and enjoy the rewarding first step toward flavorful homemade sourdough bread.
Discover more delicious recipes by following me on Facebook and Pinterest.
Frequently Asked Questions
Why Is My Sourdough Starter Not Bubbling?
A new sourdough starter may remain quiet because the room feels cool, the water contains chlorine, or the culture simply needs more time. Move the jar to a warmer location around 75°F, switch to filtered water, and continue regular feedings. You can also replace part of the white flour with whole wheat or rye flour for one or two feedings. Do not add commercial yeast. Natural fermentation often starts slowly, especially after the temporary burst of activity during the first few days. Unless you see mold or colored streaks, continue the routine for up to fourteen days.
How Do I Know When My Starter Is Ready?
A mature sourdough starter should double or more within four to eight hours after feeding and repeat that performance for several cycles. It should contain bubbles throughout the jar and smell pleasantly tangy rather than rotten. The float test can provide another clue, but it does not always give an accurate result because handling can release trapped gas. Therefore, use predictable rising as your main test. Mark the jar after feeding, record the time, and watch how long the culture takes to reach its highest point.
Can I Use All-Purpose Flour for Sourdough Starter?
Yes, all-purpose flour can create and maintain a healthy sourdough starter. Bread flour also works, while whole wheat and rye flour often encourage faster early activity. Choose unbleached flour when available because it usually supports fermentation well. More importantly, use a consistent brand and measure by weight. If an all-purpose flour starter grows slowly, feed it with half whole wheat flour and half all-purpose flour for a day or two. After activity improves, return to your regular flour or continue using a blend.
Sourdough Starter
- Total Time: 7 days 10 minutes
- Yield: About 100 grams active starter 1x
- Diet: Vegan
Description
A simple homemade sourdough starter made with equal weights of flour and non-chlorinated water. Regular feedings create a bubbly, active wild yeast culture for sourdough bread and discard recipes.
Ingredients
- 50 grams all-purpose or bread flour, about 1/2 cup, plus more for each feeding
- 50 grams room-temperature non-chlorinated water, about 1/4 cup, plus more for each feeding
Instructions
- Place a clean glass jar on a digital kitchen scale and reset the scale to zero.
- Add 50 grams of flour and 50 grams of room-temperature non-chlorinated water.
- Stir until no dry flour remains, scrape down the sides, and mark the mixture’s starting level.
- Cover the jar loosely and leave it at room temperature for 24 hours.
- After 24 hours, add another 50 grams of flour and 50 grams of water, then stir thoroughly.
- Cover loosely and leave the mixture at room temperature for another 24 hours.
- Before the next feeding, discard half of the starter.
- Add 50 grams of flour and 50 grams of water, stir, mark the level, and cover loosely.
- Continue feeding every 24 hours, discarding half before every second feeding, for 7 to 14 days.
- When the starter begins rising and falling within 12 hours, feed it every 12 hours.
- The starter is ready when it doubles within 4 to 8 hours after feeding for several consecutive cycles.
- To refrigerate, feed the starter, let fermentation begin for 1 to 2 hours, then cover loosely and chill.
- Before baking with refrigerated starter, bring it to room temperature and feed it until it doubles strongly again.
Notes
- Use a digital scale for the most consistent flour-to-water ratio.
- Filtered or non-chlorinated water supports reliable fermentation.
- Keep the starter near 70°F to 78°F and away from direct heat.
- Early bubbles do not always mean the starter is ready for bread.
- Discard the starter immediately if you see fuzzy mold or pink or orange streaks.
- Nutrition values are estimated for a 50-gram serving of a 100% hydration flour-and-water starter.
- Prep Time: 10 minutes
- Cook Time: 7 days
- Category: Bread
- Method: Fermentation
- Cuisine: American
Nutrition
- Serving Size: 50 grams
- Calories: 91
- Sugar: 0
- Sodium: 1
- Fat: 0.5
- Saturated Fat: 0.1
- Unsaturated Fat: 0.4
- Trans Fat: 0
- Carbohydrates: 19
- Fiber: 1
- Protein: 3
- Cholesterol: 0