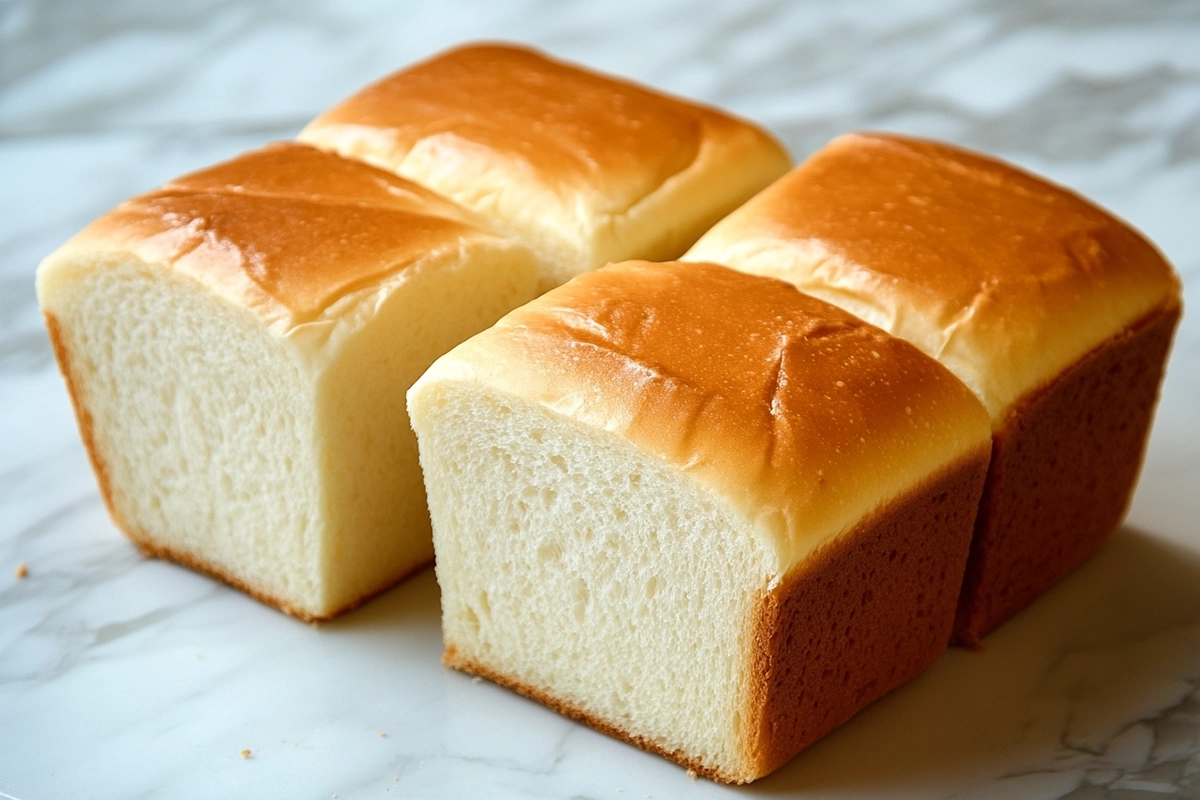
There’s something magical about homemade bread. Especially when it’s warm, soft, slightly sweet, and smells like comfort itself. If you’ve ever bitten into a pillowy piece of sweet condensed milk bread, you know exactly what we mean. This isn’t just bread — it’s a sweet, fluffy dream that melts in your mouth and makes every bite feel like a warm hug.
This article dives deep into everything you need to know about this wonderful bread. From its origins to expert baking tips, ingredient swaps, and troubleshooting help — this guide has it all. Ready to bake some joy? Let’s begin!
Introduction to Sweetened Condensed Milk Bread
Overview of Sweetened Condensed Milk Bread
Sweet condensed milk bread isn’t your average loaf. It’s soft, rich, and delicately sweet, thanks to its star ingredient — sweetened condensed milk. This luscious dairy product adds not only sweetness but also moisture, giving the bread its signature velvety texture.
Unlike dry sandwich loaves or crusty baguettes, this bread is all about tenderness and comfort. Perfect on its own or with a bit of butter or jam, it’s ideal for breakfast, snacks, or even dessert.
Historical Background and Origin
While there’s no single country to claim its birth, this style of bread has roots in several cultures. Asian bakeries, particularly in Japan and Korea, have long championed fluffy milk breads, often enriched with sweetened condensed milk. These breads are also gaining traction in Western kitchens — thanks to social media and baking blogs showing off their irresistibly soft, cloud-like crumb.
What ties them all together is their shared love of soft textures and mildly sweet flavors — a huge contrast from rustic or crusty breads.
Popularity and Modern-Day Relevance
Today, condensed milk bread is having its moment. With the rise of at-home baking and comfort food cravings, people are embracing simple, satisfying recipes. And this bread checks all the boxes — it’s forgiving, beginner-friendly, and highly customizable.
You’ll see it styled in different ways: as braided loaves, pull-apart rolls, or even mini buns. Its versatility makes it a go-to for bakers looking to impress without stressing.
Plus, it’s trending for good reason: it looks beautiful, tastes amazing, and brings people together over something warm and sweet. What’s not to love?
Up Next: We’ll dig into the must-have ingredients that make this bread a standout — from choosing the best flour to using the right kind of yeast.
Understanding the Ingredients
To bake perfect sweet condensed milk bread, you need the right ingredients. Each one plays a big role. Some make the bread soft, others help it rise, and some add flavor. Let’s break them down.
Key Ingredients and Their Roles
Sweetened Condensed Milk
This is the heart of the recipe. Sweetened condensed milk adds rich sweetness and a creamy taste. It also gives the bread its soft, moist texture.
Look for full-fat condensed milk. It gives better results. Avoid evaporated milk — it’s not the same thing.
Flour Selection
You can use all-purpose flour or bread flour. Each gives slightly different results.
-
All-purpose flour makes the bread soft and tender.
-
Bread flour adds more chew and structure.
Both work well. But for an extra fluffy texture, many bakers prefer a mix of both.
Yeast Types and Usage
You need yeast to make the bread rise. Two types work best:
-
Active dry yeast: Needs to be mixed with warm water to activate.
-
Instant yeast: Can be mixed directly with the flour.
Make sure the water is warm — not hot. About 100°F (38°C) is just right. Hot water can kill the yeast.
Additional Ingredients
Each of these adds something important:
-
Eggs: They make the dough rich and help it rise.
-
Butter: Adds flavor and a soft crumb.
-
Milk: This makes the dough moist and creamy.
-
Salt: Balances the sweetness and improves the flavor.
Every item has a job. Leave one out, and your bread might not be the same.
Using the right ingredients makes a big difference. But how you mix them also matters. Next, we’ll talk about turning these into dough — step by simple step.
Preparing the Dough
Now that you’ve got the right ingredients, it’s time to make the dough. Don’t worry — this part is easier than it sounds. You just need to mix, knead, and let it rest.
Step-by-Step Dough Preparation
Mixing the Ingredients
Start by warming your milk slightly. It should be warm, not hot. About body temperature is perfect.
In a bowl, add the sweetened condensed milk, warm milk, egg, and yeast. Stir well.
Next, add the flour and salt. Mix everything until a rough dough forms. You can use your hands or a stand mixer.
Once mixed, add the soft butter. Keep mixing until the butter blends in. The dough will look sticky at first — that’s normal.
Kneading Techniques
Kneading builds the dough’s structure. This makes it soft but not crumbly.
If using your hands, knead on a clean surface. Push the dough forward, fold it back, and repeat. Keep doing this for 10 to 12 minutes.
With a mixer, use the dough hook on medium speed for 8 to 10 minutes.
The dough should be smooth and stretchy when it’s ready.
First Proofing
Now, let the dough rest. Put it in a clean, greased bowl. Cover with a towel or plastic wrap.
Let it rise in a warm spot. It should double in size. This usually takes 1 to 2 hours.
If your kitchen is cold, place the bowl in the oven with the light on (but don’t turn the heat on).
To check if it’s ready, poke the dough with your finger. If the dent stays, you’re good to go.
You’ve made the dough, and it’s rising beautifully. What’s next? Let’s shape that fluffy dough and get it ready for the oven.
Shaping and Second Proofing
Your dough has risen. It’s soft, puffy, and ready for the next step: shaping. This is when the loaf starts to take form.
Shaping the Dough
Dividing and Pre-Shaping
Place the dough on a floured surface. Gently press it down to remove extra air.
Use a sharp knife or cutter to divide it. Make even pieces if you’re shaping rolls. For a loaf, keep it whole or divide it into three parts for braiding.
Form each piece into a ball. Let them rest for 10 minutes. This relaxes the dough and makes shaping easier.
Final Shaping Methods
Now, shape the dough as you like. Want a classic loaf? Roll it into a tight log. Making rolls? Shape each piece into smooth balls.
If braiding, stretch the dough pieces into ropes. Braid them gently, then tuck the ends under.
Place shaped dough into a greased loaf pan or on a baking tray.
Make sure there’s space — the dough will rise again.
Second Proofing
Conditions for the Second Rise
Cover the dough again with a towel or plastic wrap. Let it rise in a warm spot. This takes about 45 minutes to 1 hour.
The dough should puff up but not overflow. To check, press it lightly — it should bounce back slowly.
Don’t rush this step. The second rise gives the bread its final soft and airy texture.
You’re almost there. With your dough shaped and ready, it’s time to bake your sweet condensed milk bread to golden perfection.
Baking the Bread
Now it’s time to bake. This step turns your soft dough into golden, sweet bread. Let’s walk through it.
Baking Process
Preheating the Oven
Before anything goes in, preheat your oven. Set it to 350°F (175°C).
A hot oven helps the bread rise fast at the start. That’s what gives it a nice dome shape.
Make sure your oven is fully heated before baking. This usually takes 10–15 minutes.
Applying Egg Wash
An egg wash makes the bread shiny and golden.
To make it, mix one egg with a spoon of milk or water. Brush it gently over the top of the dough.
Don’t press too hard. Just a light coat is enough.
If you don’t want to use eggs, brush with milk or melted butter instead. It won’t shine as much, but it still works.
Baking Time and Temperature
Place the pan in the center of the oven. Bake for 25–30 minutes.
Check around the 20-minute mark. If the top is browning too fast, cover it loosely with foil.
The bread is ready when it sounds hollow if tapped. Or use a thermometer — it should read about 190°F (88°C) inside.
Once baked, take it out and let it cool a bit in the pan. Then, move it to a rack to cool fully.
That’s it — your bread is baked. No, let’s talk about keeping it fresh and fun ways to serve it.
Post-Baking and Serving Suggestions
Your sweet condensed milk bread is fresh out of the oven. It smells amazing. Now, let’s make sure it stays soft and tasty.
Cooling and Storage
Proper Cooling Techniques
Let the bread cool for 10–15 minutes in the pan. Then, remove it and place it on a wire rack.
Cooling on a rack keeps the bottom from getting soggy. Let it cool completely before slicing. This helps keep the texture soft and fluffy.
Cutting it too soon might make it gummy inside. Be patient — it’s worth the wait.
Storage Recommendations
To keep your bread fresh, wrap it tightly in plastic or store it in an airtight bag. Leave it at room temperature.
It stays good for 2 to 3 days.
Want to keep it longer? Freeze it. Wrap the whole loaf or slices in plastic wrap, then place them in a freezer bag.
To reheat, thaw at room temp, then warm in the oven for a few minutes.
Serving Ideas
Accompaniments and Pairings
This bread is tasty on its own. But it also goes well with many spreads.
Try it with butter, jam, or sweetened cream cheese. Honey and peanut butter also work great.
Want a treat? Toast a slice and drizzle it with a bit of condensed milk or melted chocolate.
Incorporating into Meals
Use it for breakfast or a snack. It’s perfect with coffee or tea.
It also makes a soft base for French toast or sweet sandwiches.
Have leftovers? Turn them into bread pudding or sweet croutons.
The best thing about this bread? It fits every moment — from lazy mornings to sweet desserts. But if you want to switch things up, you’ll love what comes next: fun twists and tasty upgrades.
Variations and Customizations
Want to add a fun twist to your sweet condensed milk bread? Good news — it’s super easy to change things up. You can make it fit your taste or diet with just a few tweaks.
Flavor Enhancements
Adding Fillings and Toppings
You can fill the dough before shaping. Try chocolate chips, chopped nuts, or dried fruit. Roll the dough flat, sprinkle the filling, and roll it up again.
You can also add toppings before baking. A sprinkle of sugar, crushed nuts, or cinnamon adds crunch and flavor.
For extra sweetness, drizzle a glaze or spread melted butter on top after baking.
Spices and Extracts
Add flavor right into the dough. A splash of vanilla extract brings a warm taste. You can also mix in cinnamon or citrus zest.
These small changes make your bread smell and taste even better.
Just be sure not to add too much. A little goes a long way.
Dietary Adjustments
Substituting Ingredients
Need a dairy-free version? Use plant-based milk and vegan condensed milk. Swap butter for coconut oil or vegan butter.
For less sugar, look for low-sugar condensed milk or make your own at home.
Keep in mind that changing ingredients may change the texture slightly. But it will still taste good.
Gluten-Free Adaptations
You can use a gluten-free flour blend. Pick one made for baking bread.
Add a binding agent like xanthan gum if it’s not already in the mix. This helps the dough hold its shape.
Gluten-free dough won’t feel the same. It’s softer and a bit sticky. That’s okay.
The bread may be a bit more crumbly, but it will still be moist and full of flavor.
Playing with the recipe is part of the fun. Whether you’re adding chocolate, making it dairy-free, or spicing it up, there’s no wrong way to bake it your way.
Common Mistakes and Troubleshooting
Even the best bakers run into problems sometimes. But don’t worry — most bread issues are easy to fix. Here’s how to handle the most common ones.
Identifying and Correcting Issues
Dough Consistency Problems
If your dough is too sticky, don’t panic. Add a little more flour, one spoon at a time. But don’t overdo it — the dough should still feel soft.
If it’s too dry or hard, add a spoon of milk. Mix it well before adding more.
Your dough should be stretchy, soft, and slightly tacky to the touch.
Proofing Challenges
Proofing helps your dough rise. But too much or too little can cause problems.
If your dough doesn’t rise, the room might be too cold. Try placing the bowl in a warmer spot. Or near a sunny window.
If it rises too fast, it could fall flat later. Watch the dough closely. When it doubles in size, it’s ready.
Too long? The dough may get sour or collapse when baked.
Baking Pitfalls
Is your bread too brown on top but raw inside? Lower the oven rack. Or, cover the top with foil during the last 10 minutes.
If the loaf is dense, it may not have proofed long enough. Or the yeast wasn’t active.
Always check that your yeast isn’t expired. Give the dough enough time to rise fully.
Mistakes happen. The good news? Each one teaches you something. Next time, your bread will be even better. Now, let’s tackle those questions people often ask about this sweet and fluffy loaf.
Frequently Asked Questions (FAQ)
Many people have questions about sweet condensed milk bread. Let’s answer the most common ones simply and clearly.
Can I make this bread without a stand mixer?
Yes, you can. Kneading by hand works well. It just takes a bit more time and effort. Around 10 to 12 minutes of kneading should be enough.
Can I use evaporated milk instead of sweetened condensed milk?
No, it’s not the same. Evaporated milk is not sweet and has more water. Sweetened condensed milk is thicker and much sweeter. Swapping them will change the taste and texture.
Why didn’t my bread rise?
This can happen if:
-
Your yeast is old or expired
-
The water or milk was too hot or too cold
-
The room was too cold for proofing
Always check your yeast and proof in a warm place.
Can I freeze this bread?
Yes, absolutely. Let the bread cool fully. Then wrap it in plastic wrap and place it in a freezer bag. It stays fresh for up to 2 months.
To reheat, thaw it at room temperature. Warm it in the oven for a few minutes for the best texture.
How can I make the bread fluffier?
Use bread flour or a mix of bread and all-purpose flour. Don’t skip kneading. And be sure to give the dough enough time to rise. A longer proof gives a lighter texture.
Can I make this recipe into rolls or buns?
Yes, you can. Just divide the dough into small balls after the first rise. Shape them into rolls and place them in a greased tray. Let them rise again before baking.
Have more questions? That’s okay. Baking is a journey, and every loaf teaches you something new. Now, let’s wrap everything up with one final bite of goodness.
Conclusion
Sweet condensed milk bread is more than just a recipe. It’s comfort, warmth, and joy — all baked into one soft, sweet loaf.
This bread is simple to make. The ingredients are easy to find. And the steps are beginner-friendly. Whether you knead by hand or use a mixer, the result is always satisfying.
Its soft texture and gentle sweetness make it perfect for any time of day. You can eat it plain, with spreads, or turn it into French toast or dessert. It fits any mood or meal.
You also have room to play. Add fillings, adjust flavors, or make it fit your diet. No matter what, it stays delicious.
So go ahead — bake your loaf. Share it with loved ones. Or keep it all to yourself. Either way, every slice is a little piece of homemade happiness.
Print
Sweet Condensed Milk Bread: The Ultimate Guide to Making This Soft and Sweet Delight
- Total Time: About 2.5 to 3 hours (including rising time)
- Yield: 1 loaf (or 8–10 rolls) 1x
- Diet: Vegetarian
Description
Sweet Condensed Milk Bread is a soft, fluffy, and slightly sweet loaf that melts in your mouth. Enriched with sweetened condensed milk, this bread is moist, tender, and perfect for breakfast, snacks, or dessert. It’s beginner-friendly and easy to customize with different flavors or fillings.
Ingredients
-
2½ cups all-purpose flour (or a mix with bread flour)
-
2¼ tsp instant yeast (or active dry yeast)
-
½ cup sweetened condensed milk
-
½ cup warm milk (about 100°F / 38°C)
-
1 large egg
-
¼ cup unsalted butter, softened
-
½ tsp salt
-
Optional: 1 egg + 1 tbsp milk for egg wash
Instructions
-
Mix the liquids: In a bowl, mix warm milk, sweetened condensed milk, egg, and yeast. Stir until well blended.
-
Form the dough: Add flour and salt. Mix until a rough dough forms. Add softened butter and knead until smooth (10–12 minutes by hand or 8–10 with a mixer).
-
First proof: Place the dough in a greased bowl. Cover and let it rise in a warm place for 1–2 hours until doubled.
-
Shape the dough: Gently press down the dough. Shape into a loaf, rolls, or braid. Place in greased pan or tray.
-
Second proof: Cover and let it rise again for 45 minutes to 1 hour, until puffy.
-
Egg wash: Brush with egg wash or milk for a golden finish.
-
Bake: Preheat oven to 350°F (175°C). Bake for 25–30 minutes. Cover with foil if it browns too quickly.
-
Cool: Let cool in the pan for 10–15 minutes. Then, transfer to a wire rack to cool completely.
Notes
-
For extra fluffiness, use half bread flour.
-
To freeze, wrap well and store up to 2 months.
-
Add-ins like chocolate chips, raisins, or cinnamon can be rolled in before shaping.
-
Use plant-based milk and vegan butter for a dairy-free version.
-
Gluten-free flour blends work, but the texture may vary.
- Prep Time: 20 minutes
- Rising Time: 2 hours 10 minutes
- Cook Time: 30 minutes
- Category: Bread
- Method: Baking
- Cuisine: Asian-Inspired / Fusion