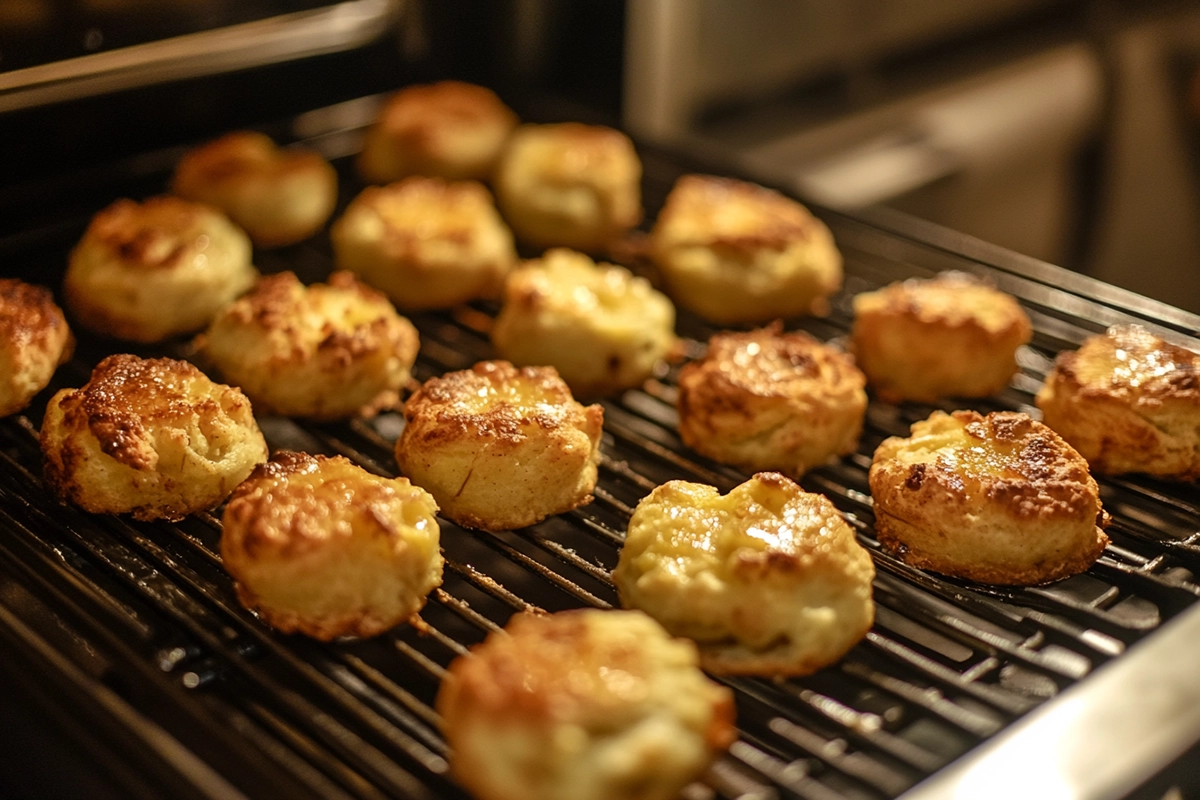
There’s something incredibly comforting about the warm, spiced aroma of baked apple fritters filling the kitchen. These golden, slightly crispy pastries pack all the flavor of the classic fried version but without the extra oil. Whether you’re looking for a healthier dessert, a quick breakfast treat, or a fun weekend baking project, this recipe delivers!
This guide walks you through everything—from understanding what makes baked apple fritters special to pro tips for achieving the best texture. Let’s start with a deep dive into what makes these treats irresistible!
Introduction to Baked Apple Fritters
What Are Baked Apple Fritters?
Imagine biting into a warm, cinnamon-spiced pastry bursting with sweet, juicy apples. That’s the magic of a baked apple fritter! Unlike traditional deep-fried fritters, this version gets its crisp exterior and fluffy interior from baking. It’s a game-changer—the same delicious taste, but healthier and easier to make.
Fritters, in general, have a long history. They originated as a way to transform simple ingredients into hearty, satisfying treats. The apple fritter variation became popular in America, where apples are abundant. Traditionally, these pastries were deep-fried, resulting in a crispy, rich flavor. But with modern baking techniques, we can achieve the same soft yet slightly crisp texture—minus the excess oil.
The best part? Baked apple fritters are versatile. They can be a grab-and-go breakfast, a lunchbox snack, or a delightful dessert. Top them with a simple glaze, a dusting of cinnamon sugar, or enjoy them plain—either way, they’re delicious!
The Appeal of Baking Over Frying
Let’s face it—deep frying can be messy, time-consuming, and heavy on calories. That’s why baked versions of classic fried foods are gaining popularity.
Why Choose Baked Apple Fritters?
Healthier Alternative – Since baking eliminates the need for excessive oil, these fritters have fewer calories and less fat. That means you can enjoy them without the guilt!
Less Mess, More Convenience – Frying requires constant attention, precise temperature control, and a good amount of cleanup. With baking, you just mix, scoop, and pop them in the oven.
Retains Flavor Without Grease – Instead of overpowering the apple and cinnamon with oil, baking lets their natural sweetness and warm spice shine through.
Crisp Yet Fluffy Texture – You might think frying is the only way to achieve a crispy outside and soft inside, but baking can do the trick—especially with the right tips (which we’ll cover later).
Kid-Friendly & Family Approved – These fritters are perfect for little hands! Plus, they’re less greasy, making them ideal for school snacks or breakfast on the go.
Want to elevate them even more? Pair them with a warm cup of coffee or a glass of milk for the ultimate cozy treat.
Now that you know why baked apple fritters deserve a spot in your kitchen, it’s time to talk about ingredients and the simple swaps you can make to suit your taste and dietary needs!
Ingredients and Preparation
Essential Ingredients for Baked Apple Fritters
Great baked apple fritters start with the right ingredients. Each one plays a key role in flavor and texture. Here’s what you’ll need:
| Ingredient | Purpose |
|---|---|
| Apples | The star ingredient. Adds natural sweetness and moisture. |
| Flour | Gives structure to the fritters. Use all-purpose for best results. |
| Baking Powder | Helps them rise, making them light and fluffy. |
| Sugar | Sweetens the fritters. Brown sugar adds a deeper flavor. |
| Cinnamon & Nutmeg | Brings warmth and spice, making them extra delicious. |
| Eggs | Binds the ingredients together for a smooth batter. |
| Milk | Adds moisture and keeps the batter from being too thick. |
| Butter | Adds richness and flavor. Keeps the fritters soft. |
| Vanilla Extract | Enhances the overall taste with a sweet aroma. |
| Salt | Balances the sweetness and brings out flavors. |
For best results, use firm apples like Granny Smith or Honeycrisp. They hold up well while baking, adding the perfect balance of sweetness and tartness.
Ingredient Substitutions and Variations
Need to tweak the recipe? No problem! Here are some simple swaps:
Flour Alternatives – Try whole wheat flour for a heartier texture or gluten-free flour for a GF-friendly treat.
Dairy-Free Options – Use almond milk, oat milk, or soy milk instead of regular milk. Swap butter for coconut oil or vegan butter.
Sugar Alternatives – Replace white sugar with honey, maple syrup, or coconut sugar for a natural touch.
Egg Replacements – If you’re vegan, use applesauce or a flaxseed meal instead of eggs.
Extra Flavor Twists – Add cardamom for warmth, mix in chopped nuts for crunch, or stir in raisins for extra sweetness.
Small changes can make a big difference. Pick what works best for you!
Now that we’ve got the ingredients sorted, let’s dive into the step-by-step baking process!
Step-by-Step Baking Instructions
Preparing the Apples
Apples are the heart of baked apple fritters. Picking the right kind makes all the difference.
Steps to Prep Apples:
- Choose Firm Apples – Granny Smith, Honeycrisp, or Fuji work best. Soft apples turn mushy.
- Peel and Core – Remove the skin and seeds. This helps the apples blend smoothly into the batter.
- Dice into Small Pieces – Keep them bite-sized. This ensures even cooking.
- Toss with Lemon Juice – Prevents browning and adds a hint of tanginess.
- Sprinkle with Cinnamon and Sugar – Boosts flavor before baking.
Proper prep makes sure every bite is full of sweet apple goodness.
Making the Batter
The batter should be thick but easy to scoop. Follow these simple steps:
- Mix Dry Ingredients – In a large bowl, whisk flour, baking powder, cinnamon, nutmeg, and salt.
- Cut in Butter – Add cold, cubed butter. Use a fork or pastry cutter until it looks like coarse crumbs.
- Whisk Wet Ingredients – In a separate bowl, combine eggs, milk, vanilla, and sugar.
- Combine Wet and Dry – Slowly mix wet ingredients into dry. Stir gently. Overmixing makes tough fritters.
- Fold in Apples – Add diced apples last. Stir just until combined.
That’s it! The batter is now ready for shaping.
Shaping and Baking the Fritters
Now it’s time to bake!
- Preheat the Oven – Set it to 400°F (200°C). Line a baking sheet with parchment paper.
- Scoop the Batter – Use a spoon or ice cream scoop. Drop small mounds onto the sheet.
- Flatten Slightly – Press each fritter gently. This helps them bake evenly.
- Bake Until Golden – About 12–15 minutes. They should be puffed up and slightly crisp.
- Cool for a Few Minutes – Let them rest before adding glaze.
Baking gives them a perfect soft center with a golden top. No frying needed!
Next, we’ll add the final touch—glazing and serving!
Tips, Variations, and Serving Ideas
Pro Tips for Perfect Baked Apple Fritters
Want the best-baked apple fritters? Follow these simple tips:
Don’t Overmix – Stir batter gently. Too much mixing makes fritters dense.
Use Fresh Apples – Soft or mealy apples won’t hold up. Choose firm ones.
Space Them Out – Leave room between fritters on the baking sheet. This helps them bake evenly.
Watch the Oven – Every oven is different. Check them at 12 minutes to avoid overbaking.
Glaze While Warm – This helps the glaze stick better for a sweet, glossy finish.
These small tricks make a big difference!
Flavor Variations
Want to mix things up? Try these fun variations:
Nutty Crunch – Add chopped walnuts or pecans for extra texture.
Raisin Swirl – Mix in raisins or dried cranberries for a fruity twist.
Maple Glaze – Swap the classic glaze for a maple syrup drizzle.
Caramel Drizzle – Warm caramel sauce takes these fritters to the next level.
Spice It Up – Add a pinch of cardamom or ginger for extra warmth.
Experiment to find your favorite combo!
Serving Suggestions
Baked apple fritters taste best fresh. Here’s how to enjoy them:
With Coffee or Tea – The perfect breakfast or afternoon snack.
With Yogurt – Adds a creamy contrast to the warm, spiced fritters.
With a Scoop of Ice Cream – A warm and cool treat in one bite!
With Honey or Syrup – Drizzle for extra sweetness.
As a Lunchbox Treat – Pack one for a quick, tasty snack.
Want to make them even better? Warm them up before serving. It brings out the flavors!
Comparison – Baked vs. Fried Apple Fritters
Which One Tastes Better?
Both are delicious, but they have key differences. Fried apple fritters have a crispy, deep-fried crunch. Baked ones are lighter but still soft and flavorful. If you love a rich, buttery taste, fried may be your pick. But if you want something less greasy, baked is the way to go!
Which One Is Healthier?
Baking wins here. Fried fritters soak up a lot of oil, increasing fat and calories. Baked fritters skip the oil, making them a better choice if you’re watching your diet.
Which One Is Easier to Make?
Baking is much simpler! No need to heat oil, check temperatures, or deal with splatters. Just mix, scoop, and bake. Less mess, less stress.
Which One Stays Fresh Longer?
Baked fritters keep better. They stay soft for days, while fried ones lose crispiness fast. Store baked fritters in an airtight container for up to a week.
Final Verdict
If you want classic, crispy fritters, go for frying. But if you want a healthier, easier, and just as tasty treat, baked is the best choice!
Up next, we’ll answer some common questions about baked apple fritters!
Frequently Asked Questions (FAQs)
Are baked apple fritters healthier than fried ones?
Yes! Baking cuts out extra oil, making them lower in fat and calories. They still taste amazing but without the grease.
What are the best apples to use?
Firm apples work best. Granny Smith, Honeycrisp, and Fuji hold their shape while baking. Softer apples may turn mushy.
Can I make them gluten-free?
Yes! Use a gluten-free flour blend. Make sure it contains xanthan gum for the best texture.
How do I store leftovers?
Keep them in an airtight container at room temperature for up to two days. For longer storage, refrigerate for up to a week.
Can I freeze baked apple fritters?
Absolutely! Place them in a sealed freezer bag and freeze for up to three months. Reheat in the oven at 350°F until warm.
Why are my fritters too dry?
Overbaking is the main cause. Check them at 12 minutes to avoid drying out. Also, make sure your apples are fresh and juicy.
Can I add a glaze?
Yes! A simple mix of powdered sugar and milk makes a delicious glaze. Drizzle over warm fritters for the best taste.
How do I reheat them?
Warm them in the oven at 350°F for 5 minutes. Avoid microwaving, as it can make them soggy.
Got more questions? Drop them in the comments!
Conclusion & Call-to-Action
Why You Should Try Baked Apple Fritters
Baked apple fritters are easy, tasty, and healthier than fried ones. They have a soft center, crisp edges, and a warm cinnamon-apple flavor. Perfect for breakfast, snacks, or dessert!
Simple, No-Fuss Baking
No deep frying. No messy oil. Just mix, scoop, and bake! Anyone can make them, even beginner bakers.
Customize Your Way
Want extra crunch? Add nuts. Love more spice? Sprinkle in ginger or cardamom. Craving extra sweetness? Drizzle with glaze or caramel. The possibilities are endless!
Try It & Share!
Now it’s your turn! Bake a batch and enjoy. Tell us how they turned out in the comments. Got a fun twist on the recipe? We’d love to hear it!
Happy baking!
Print
The Ultimate Guide to Baked Apple Fritters
- Total Time: 33 minutes
- Yield: 12 fritters 1x
- Diet: Vegetarian
Description
These Baked Apple Fritters are a healthier, oven-baked version of the classic deep-fried treat. Packed with tender, cinnamon-spiced apples, and a light, fluffy batter, they are golden brown and topped with a sweet glaze. Perfect for breakfast, brunch, or an afternoon snack, these fritters offer all the delicious flavors of fall without the extra calories from frying!
Ingredients
For the Fritters:
- 2 cups all-purpose flour
- 2 tsp baking powder
- 1 tsp cinnamon
- ¼ tsp nutmeg
- ½ tsp salt
- 2 large eggs
- ½ cup milk
- ½ cup granulated sugar
- 1 tsp vanilla extract
- 2 tbsp unsalted butter, melted
- 2 large apples (peeled, cored, and chopped)
- ½ cup chopped walnuts (optional)
For the Glaze:
- 1 cup powdered sugar
- 1 tbsp milk
- ½ tsp vanilla extract
- ¼ tsp cinnamon
Instructions
Prepare the Fritters:
- Preheat oven to 375°F (190°C) and line a baking sheet with parchment paper.
- In a medium bowl, whisk together flour, baking powder, cinnamon, nutmeg, and salt. Set aside.
- In a separate bowl, whisk together eggs, milk, sugar, vanilla extract, and melted butter.
- Gradually add the dry ingredients to the wet ingredients, mixing until just combined.
- Fold in the chopped apples and walnuts (if using). The batter will be thick and chunky.
Bake the Fritters:
- Using a spoon, drop large spoonfuls of the batter onto the prepared baking sheet, spacing them about 2 inches apart.
- Bake for 15-18 minutes, or until golden brown and a toothpick inserted comes out clean.
- Let the fritters cool for a few minutes on the baking sheet before transferring them to a wire rack to cool completely.
Prepare the Glaze:
- In a small bowl, whisk together powdered sugar, milk, vanilla extract, and cinnamon until smooth and drizzly.
- Drizzle the glaze over the cooled fritters.
Serve & Enjoy:
- Allow the glaze to set for a few minutes before serving. Enjoy your delicious Baked Apple Fritters with a cup of coffee or tea!
Notes
- Storage: Store leftover fritters in an airtight container at room temperature for up to 3 days.
- Add-ins: You can add raisins, cranberries, or dried apricots to the batter for extra flavor.
- Make it Vegan: Use plant-based milk and vegan butter, and substitute the eggs with a flax egg (1 tbsp ground flaxseed + 3 tbsp water).
- Prep Time: 15 minutes
- Cook Time: 18 minutes
- Category: Breakfast / Dessert
- Method: Baking
- Cuisine: American